Imagine that your business is able to reach more than 1 billion people worldwide. This is the number of iOS users announced in September 2021. On the Apple Store, a lot of potential can surge for your business by landing a mobile app there. The nandbox team will guide you to the Apple Store. Within the coming lines, you will know how to upload your app—built on nandbox App Builder—on the App Store Connect. There, you can prepare your app to get published on the Apple Store and manage it as well in the future. That’s after creating the App Store Connect account.
What is nandbox App Builder?
nandbox is a Canadian mobile app development platform, established in 2016. The SaaS platform has developed a no-code, mobile app builder, which enables everyone to make mobile apps with best-in-class capabilities. In other cases, companies and individuals needed to screen and recruit technical personnel for app development tasks. But with nandbox App Builder, you can build personalized, native, hosted-ready mobile apps with simple drag-and-drop. Neither coding nor upfront costs are needed—but a 7-day free trial and lifetime app support are.
Once you subscribe to the professional plan or the premium plan, nandbox has a specialized team that will help you publish your app on the Google Play Store and the App Store. The team will guide you through the steps needed to ensure that the app is live on both stores. Sign up now and build native iOS and Android apps without coding!
7 basic steps on App Store Connect to anchor your app on the Apple Store
Step 1: Enroll Apple Developer Account
To submit your app to the Apple Store, you’ll need a developer account. For an Apple Developer account, you have to pay a one-time fee of $99 for individual accounts and $299 for organizational ones.
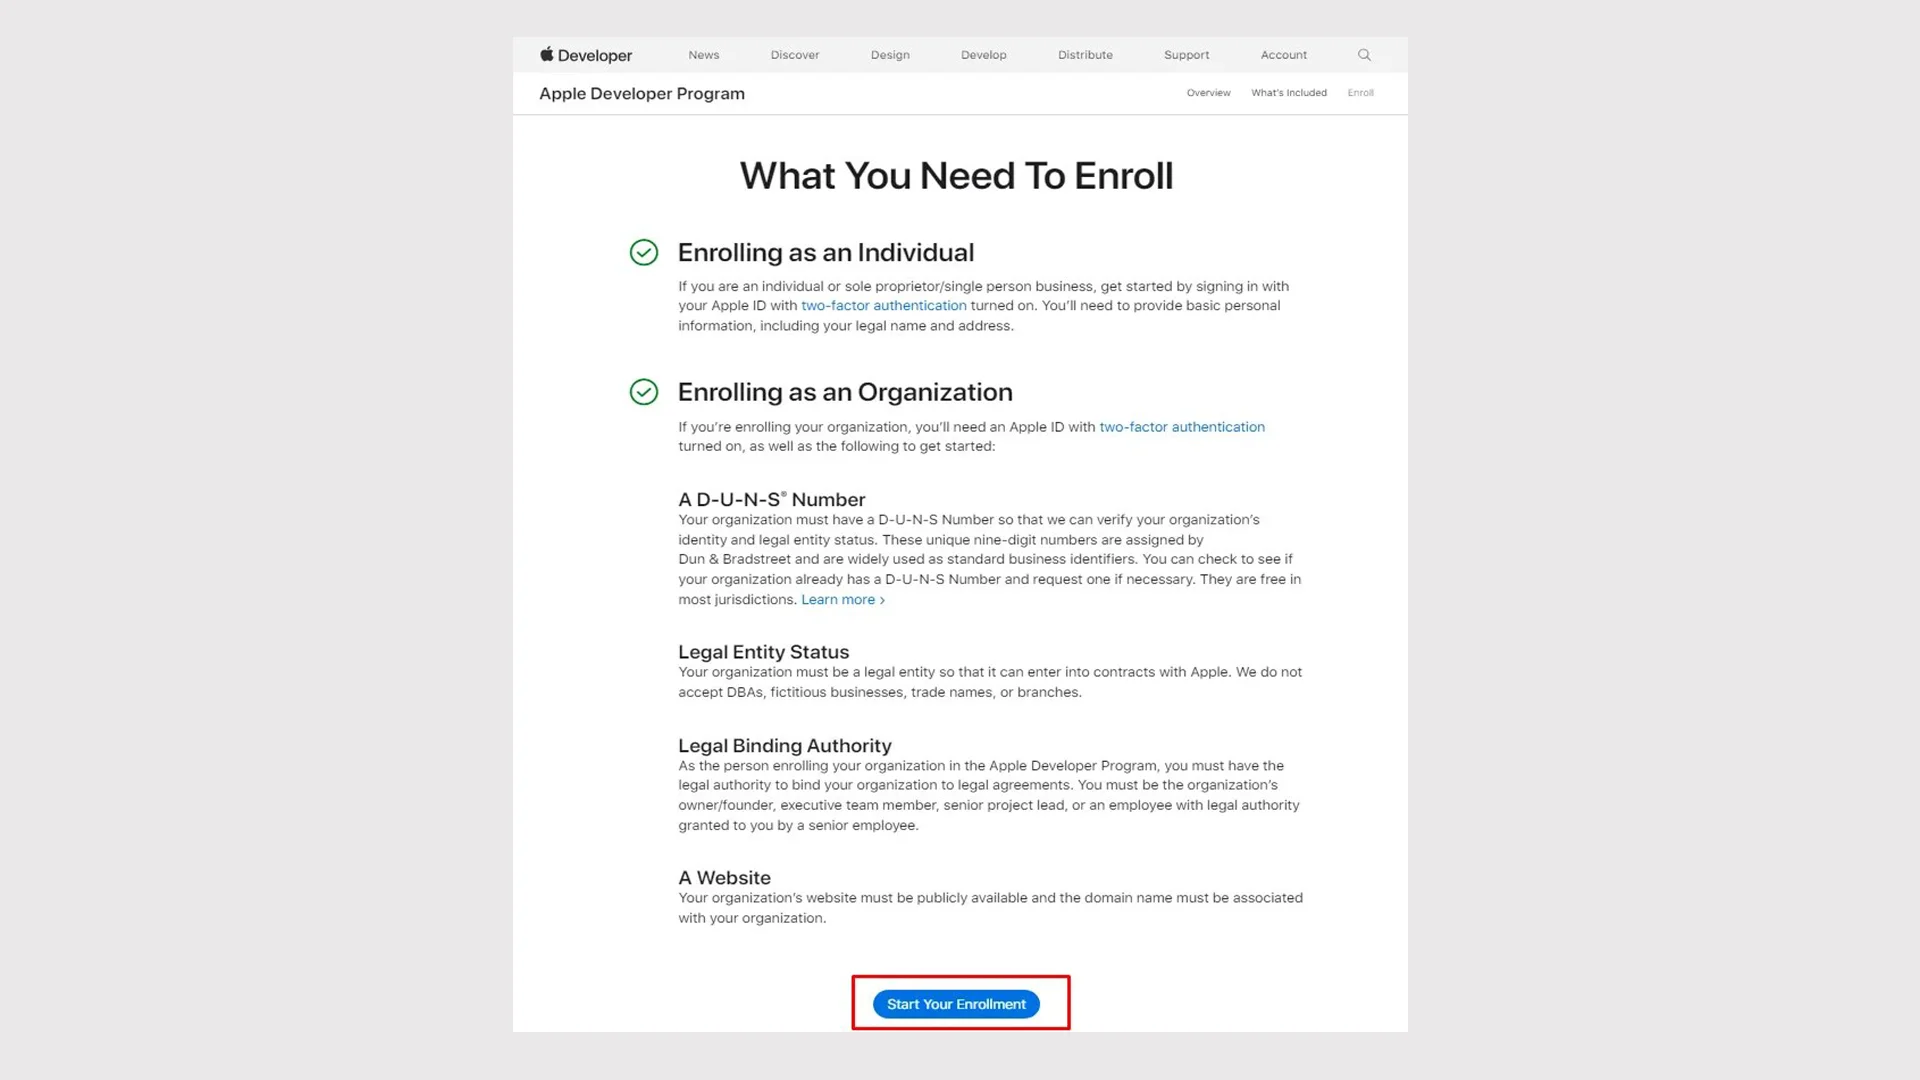
and don’t forget to invite nandbox as your App Manager. Here is a guide on how to do it.
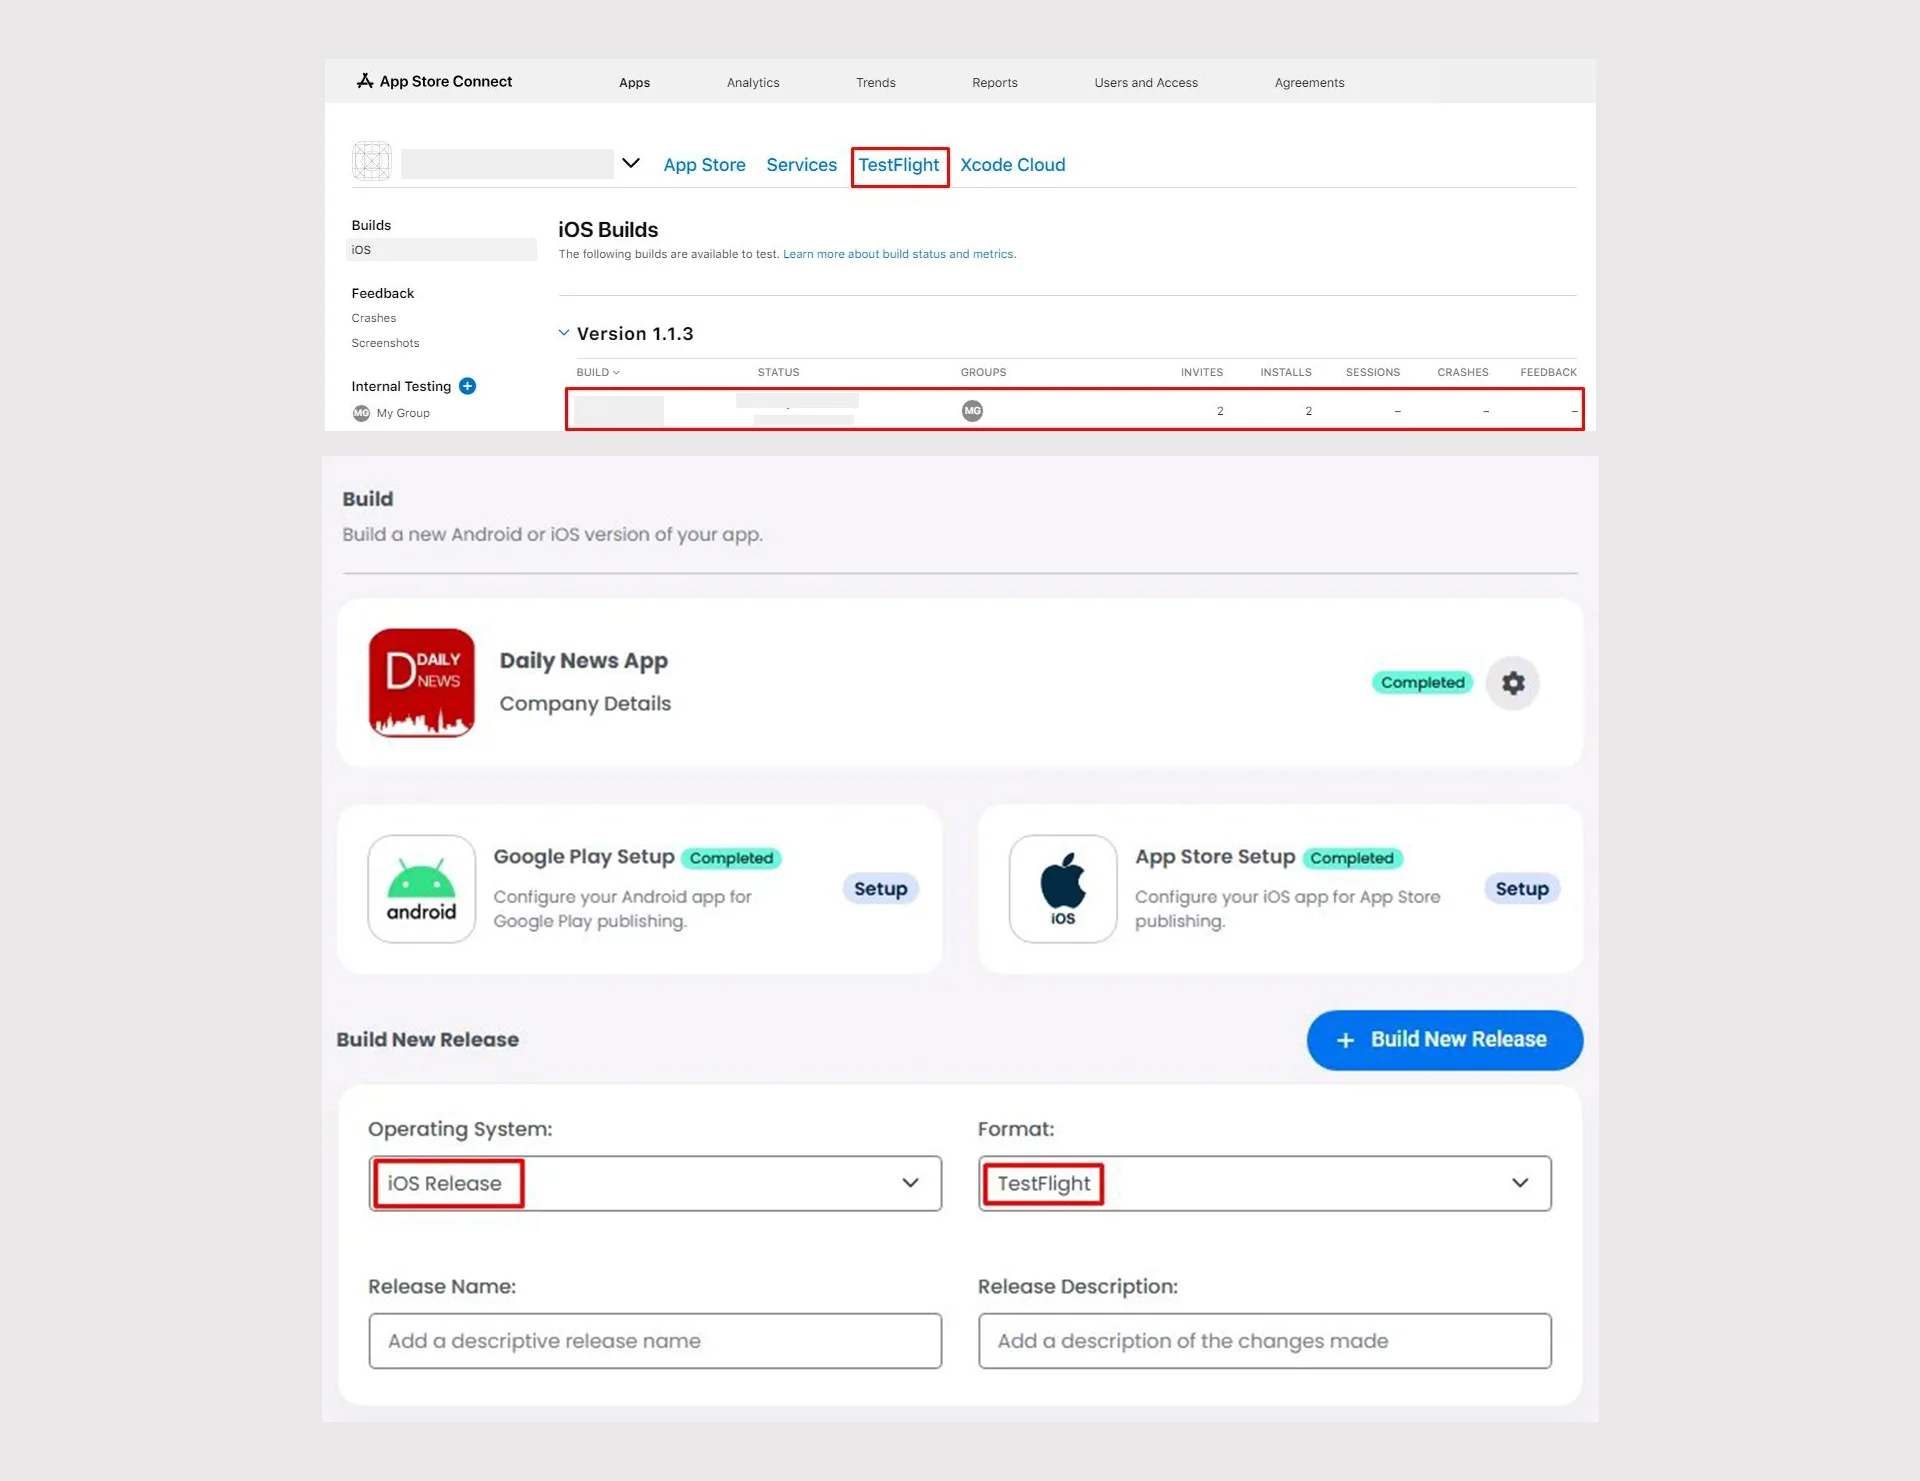
Step 2: Upload IOS release to TestFlight
In order to test your app and upload it to your Apple Developer account, you need to download TestFlight on your device. Once you build an iOS release from your nandbox app builder, it will be uploaded automatically to TestFlight and your developer account.
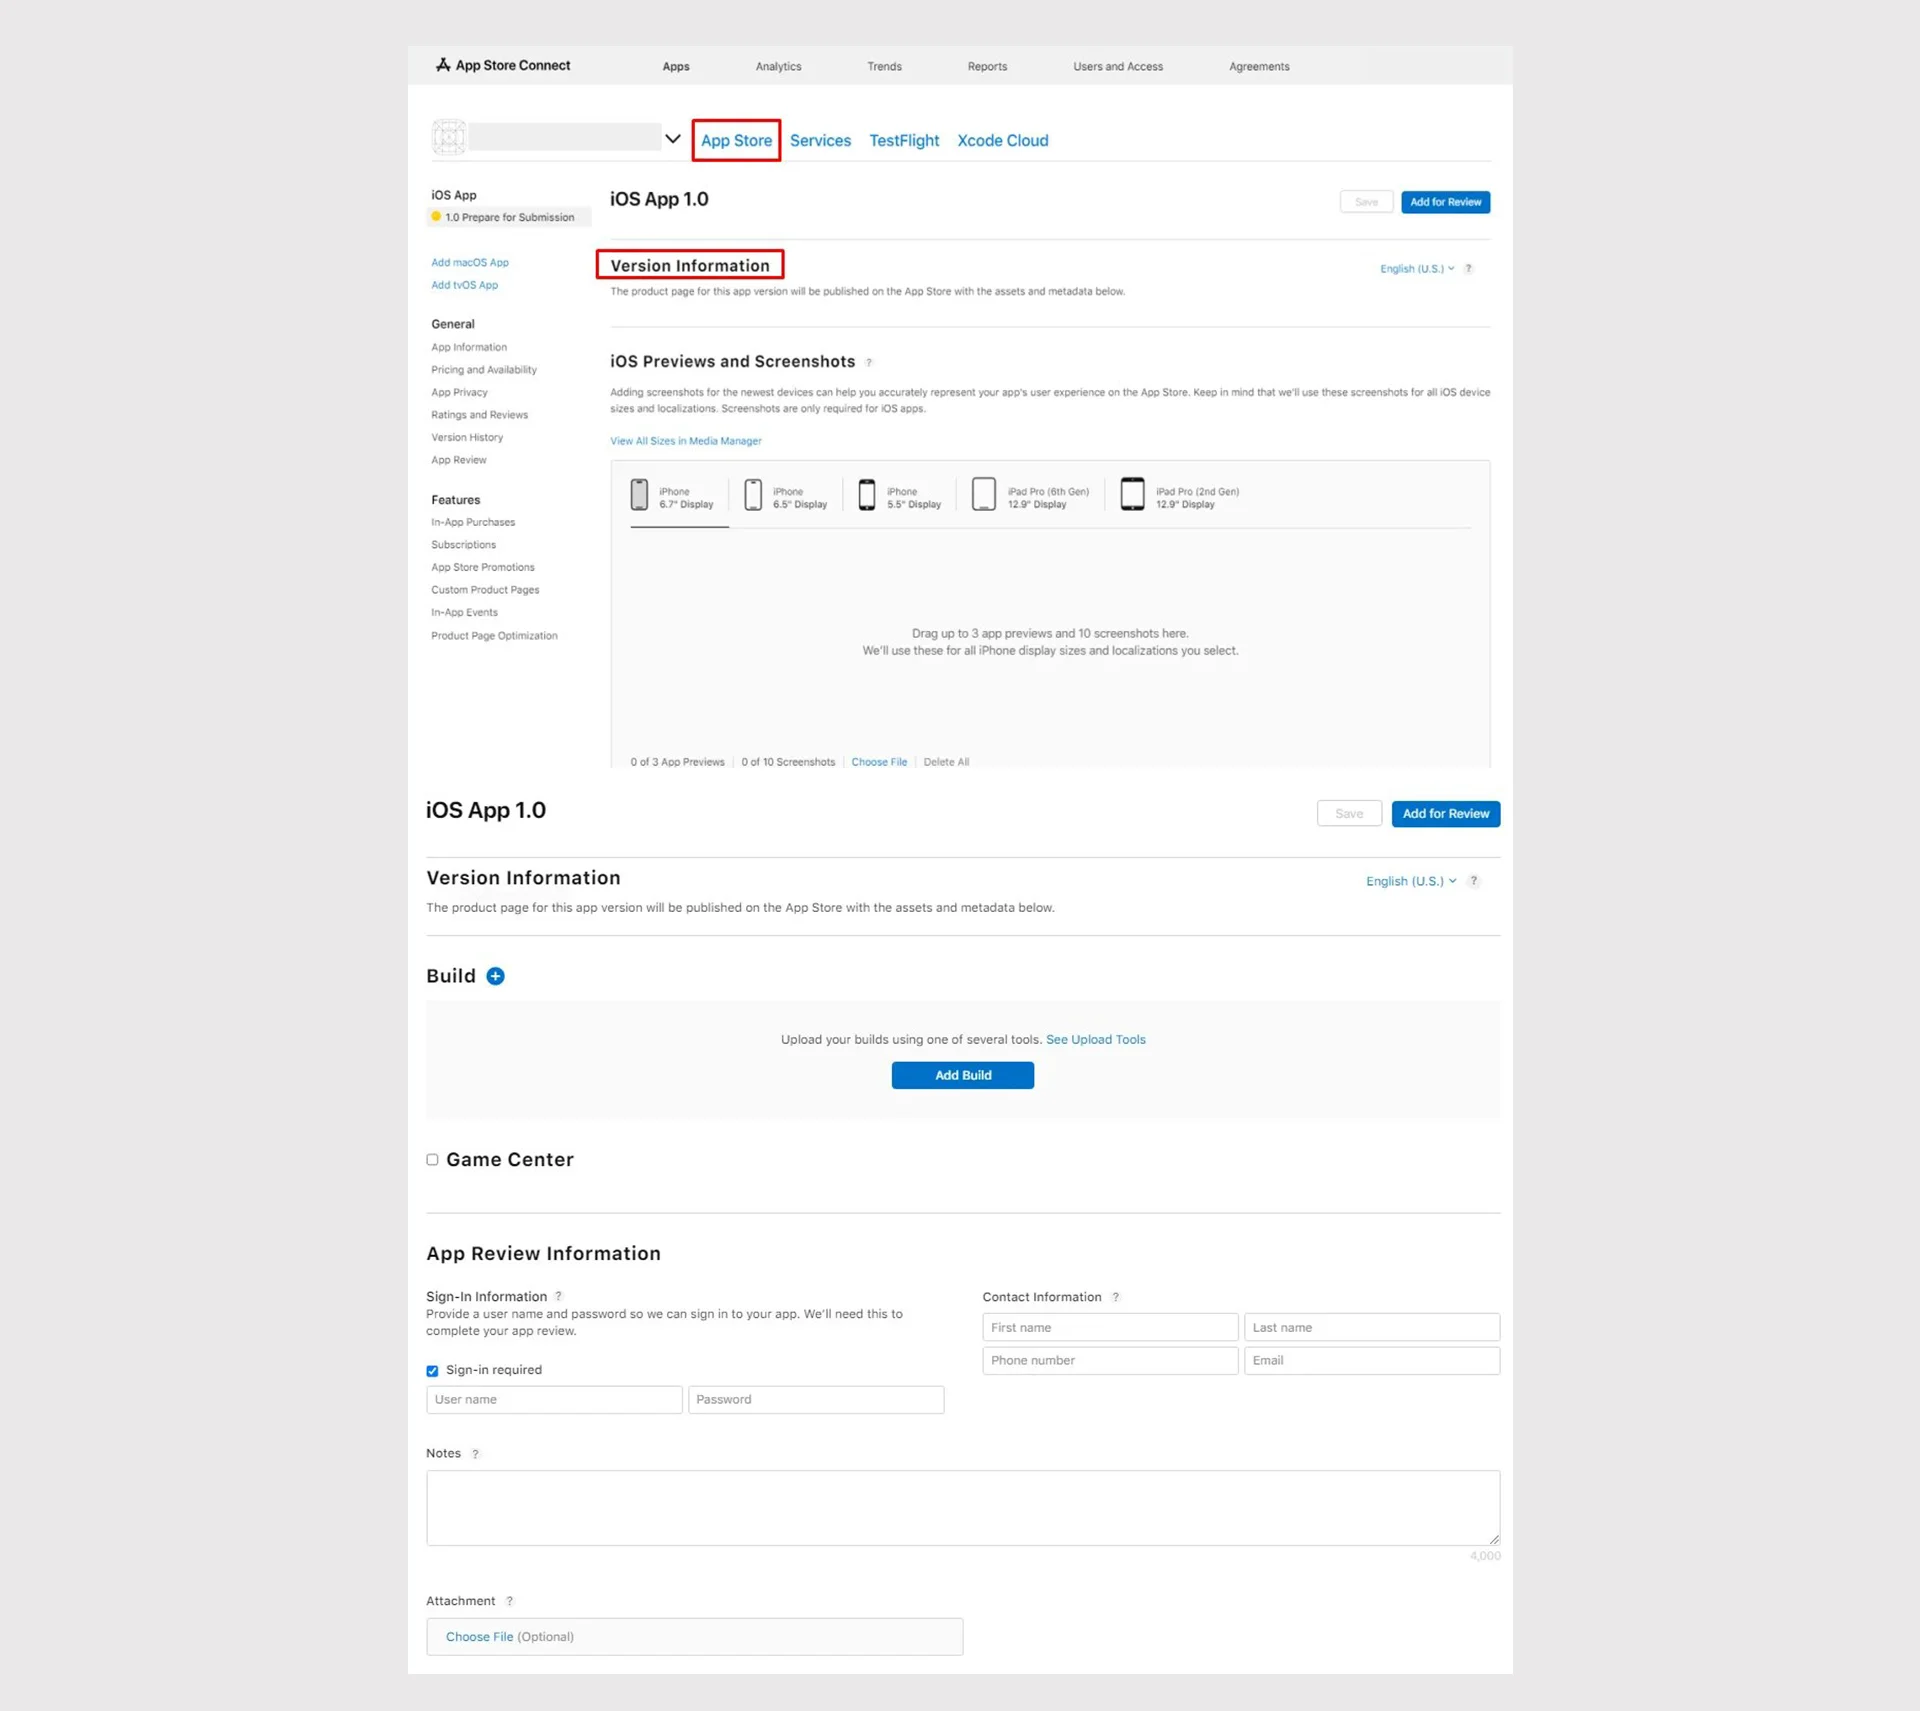
Step 3: Set your Version information
You must include details about your application, such as its name, description, keywords, support link, tested build, and more. Upload any available video previews and screenshots as well.
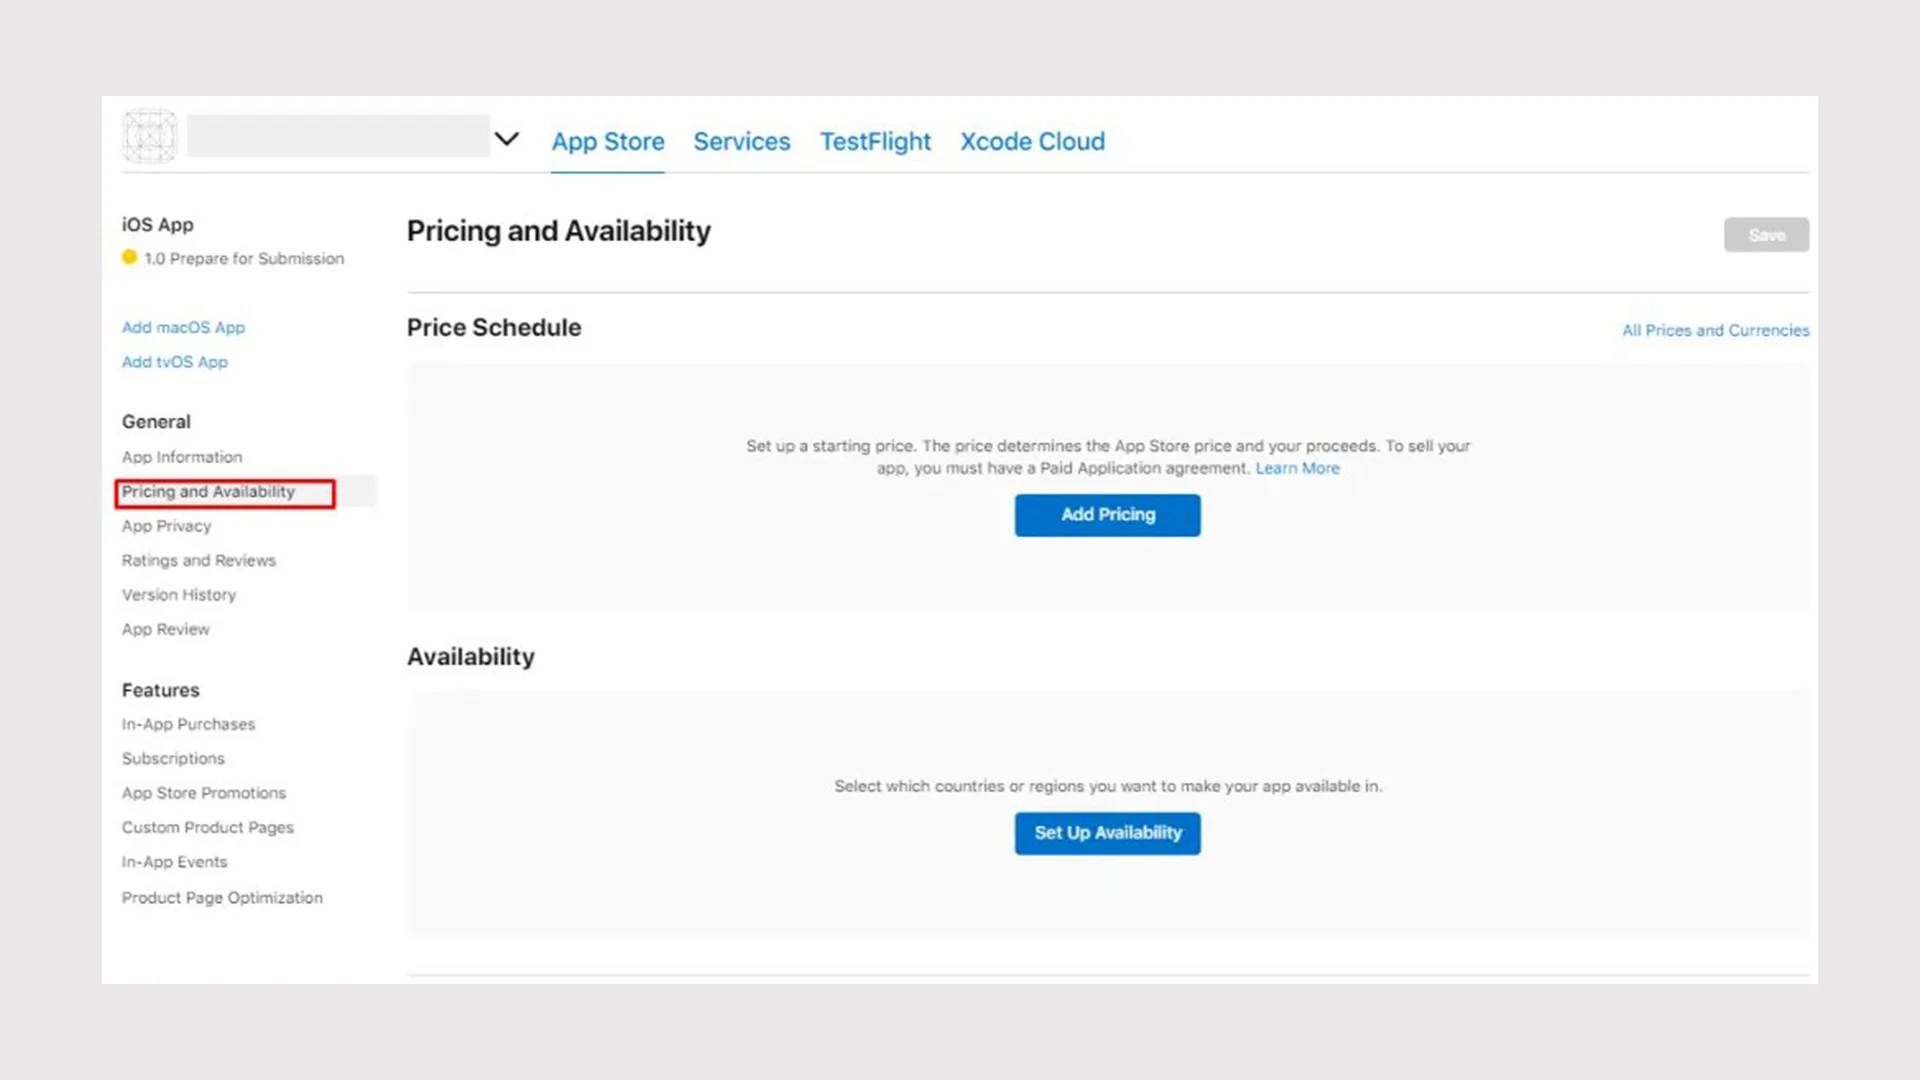
Step 4: Set your Pricing and Availability
Choose whether your app will be free or paid, and set the price if it’s paid. Choose the regions where it can be sold.
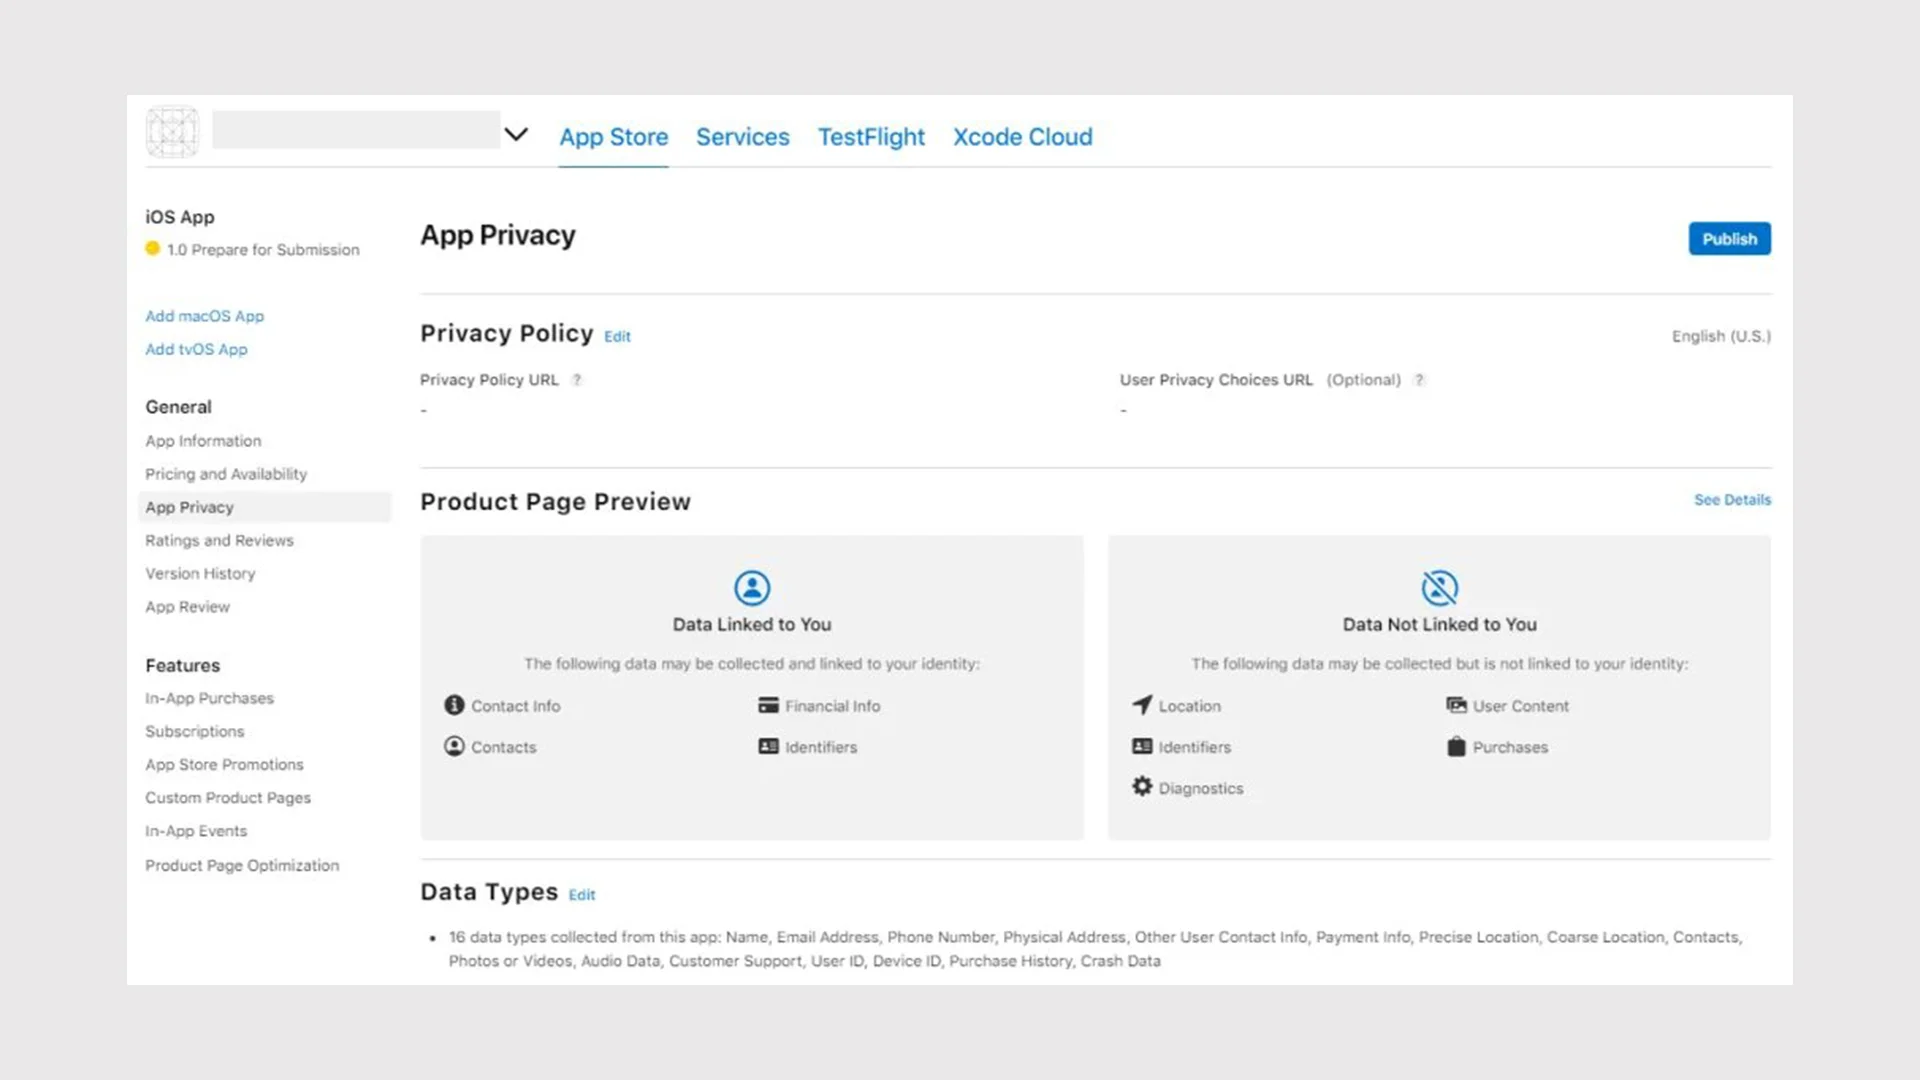
Step 5: Set your app’s Privacy
You MUST make your app’s privacy policies and data collection techniques transparent because it collects user data. Make sure to answer all of Apple’s privacy questions and provide information on how you collect data from users.
Here is an Apple guide for more information
Step 6: Send for review
You can submit the app for review once all the necessary app information, including pricing and privacy, has been submitted. Your app will be compared to Apple’s guidelines, and the Apple App Store will approve your release if everything is in order.
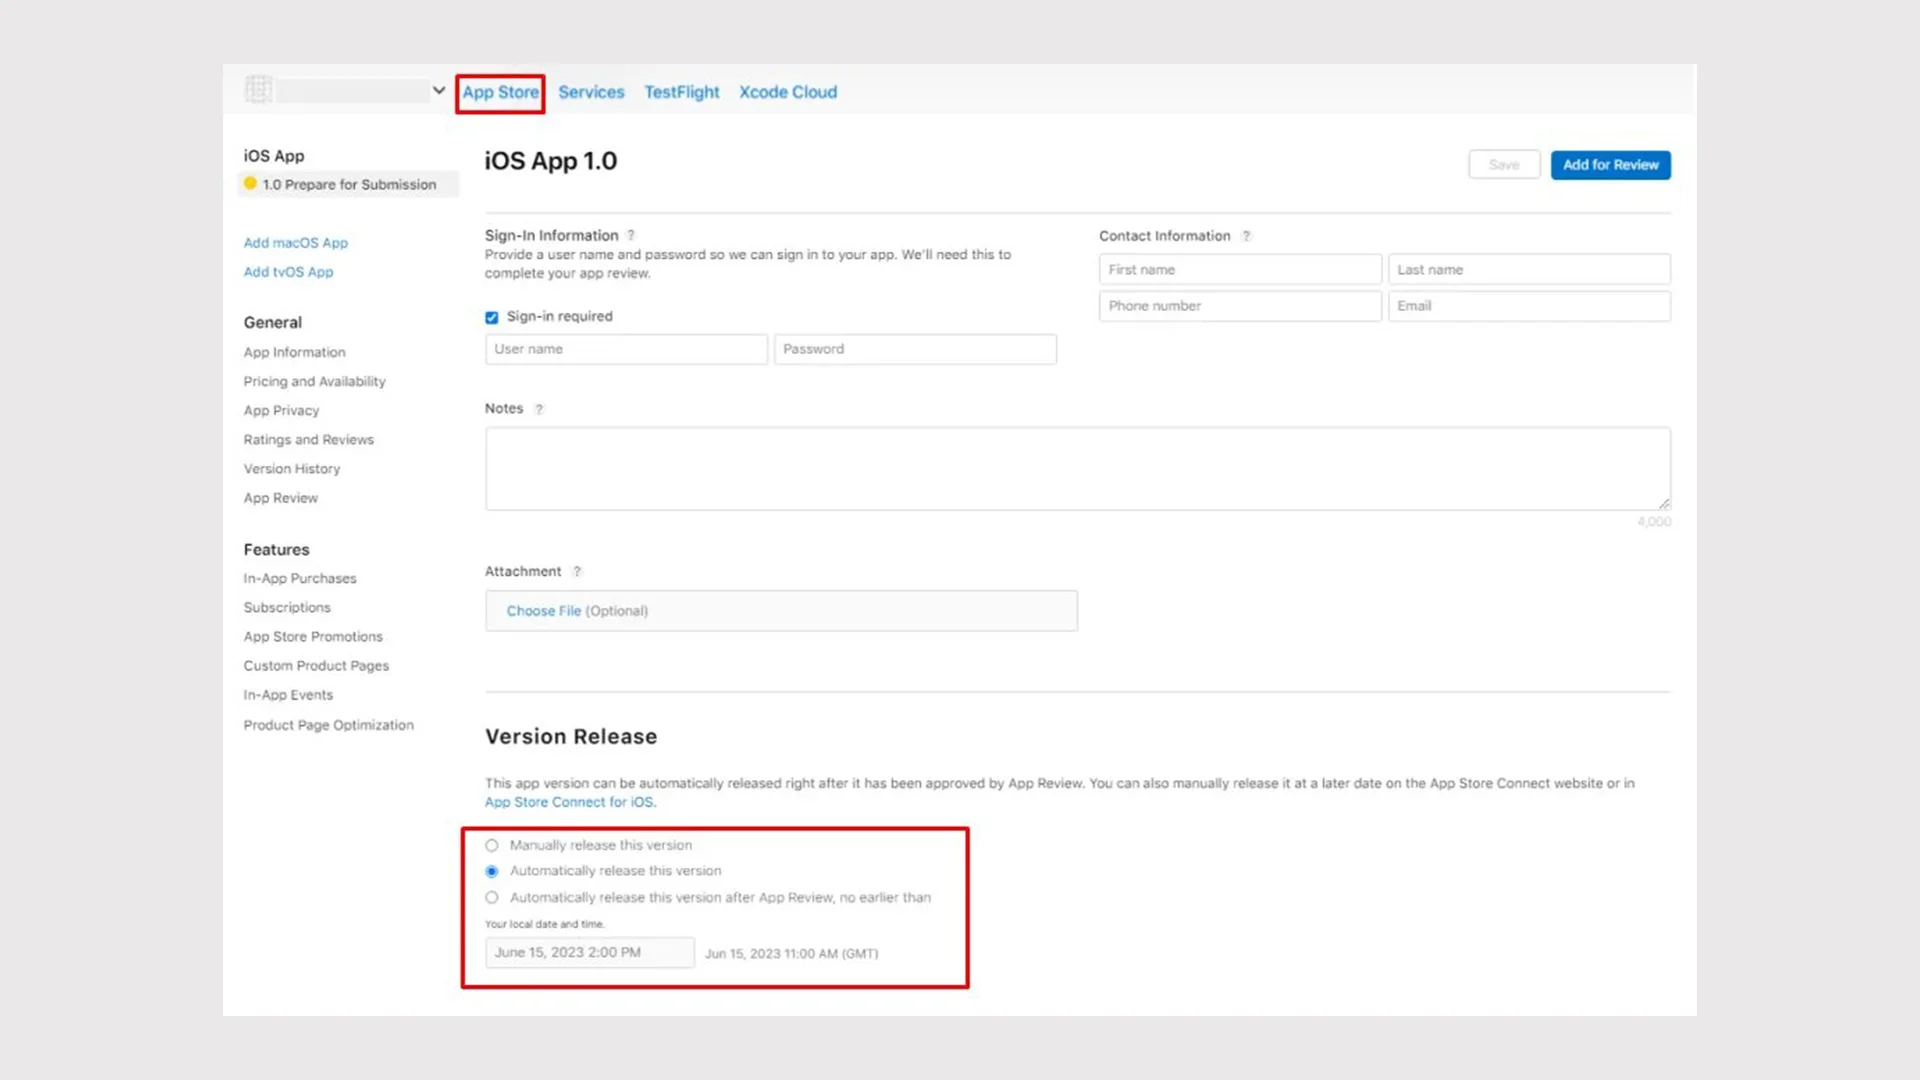
Step 7: Release Your App
You can choose whether to manually release the app after the review process or let it happen automatically. If released automatically, the App Store will submit your app immediately upon approval.
Make sure to check all your policies continuously to track Apple’s instructions and warnings in order to update them.
Check out this documentation to guide you through the process in detail.
Feel free to contact us at support@nandbox.com. We are glad to support you wherever you are.
How to Create an App Using ChatGPT without Coding On a Budget
Ever wondered how to create an app using ChatGPT? With nandbox App Builder GPT, you can build both iOS and Android native apps using ChatGPT without coding. You can just describe what you want in ChatGPT. Once you finish the conversation, the GPT instantly gives you a direct link to nandbox. This is where you can find your app generated and ready to be customized or published.