Developers at nandbox Inc. are always at work expanding the nandbox app builder features and creating more. The purpose is to entice users to make fully functional apps in various categories. This time, we introduce the nandbox workflow feature, a new module that will help you create an all-in-one app for your business. The workflow feature is one of the most powerful features to add to our list of features. Stick around for this article to learn more about the new workflow feature, how it works, and how you can put it to use.
What is the Workflow Feature?
The workflow is a new feature you can add to the home menu of your app.
Think of a telecom account. You want to add credit to your account, so you head to the home menu and click on “Recharge.” You will get a prompt to enter the amount you want to recharge with and your bank information, then click submit. Afterward, you will get a message that confirms your payment has been processed.
You can now include that feature in your app to allow users to pay fees or get information using any third-party servers associated with your business. This is just one application of the workflow feature; you can do so much with your app when you add it.
To recap, as an app owner, you can add a clickable welcome screen with a description of what the user is about to do, input cells where they can enter any information, submit buttons, and output cells that provide them with any information.
With the new app builder UI, you can view all the workflow menus at once. And you can select which menu comes next. For example, you can choose the menu with the input cells after the welcome screen.
Applications of the Workflow Feature
This feature has many applications, and we’ve decided to provide some. You can devise other ideas to utilize this feature and integrate it within your app.
- Telecom app: Telecommunication companies can make a fully functional app with this feature, as mentioned above. Also, nandbx offers a pre-made telecom ap template.
- E-Wallet: Stores can also use this feature to make apps where the users are redirected to a screen to enter their credit card information. Then, money should be paid or added to their account that they can use for different purposes.
- Integrating with different payment systems: For example, an education app can integrate with the school’s payment system for parents and guardians to pay fees. The same applies to other entities like hospitals, clinics, charity organizations, and more.
- Integration with any systems: Along with payment, users could retrieve information from another system through the feature. For example, parents can enter their children’s school ID numbers to get their grades from the system. Similarly, users can find out about their balance in eWallets. The possibilities are endless.
How Does It Work?
The workflow module is an interface for existing backend services, a marriage between your app and third-party servers. As an app owner, you can enter your system’s API ID for users to access when they click the submit button you assign. When users enter a child’s school ID, the ID number is sent to the school’s server. In return, the server responds by sending their grades to the app for their parents to view.
The purpose of this feature is so that the school, or any other entity, doesn’t have to create a separate app for the payment system. Their school app will be a comprehensive app that parents and teachers can access for anything, especially with other features like calendars, channels, news feeds, and group chats.
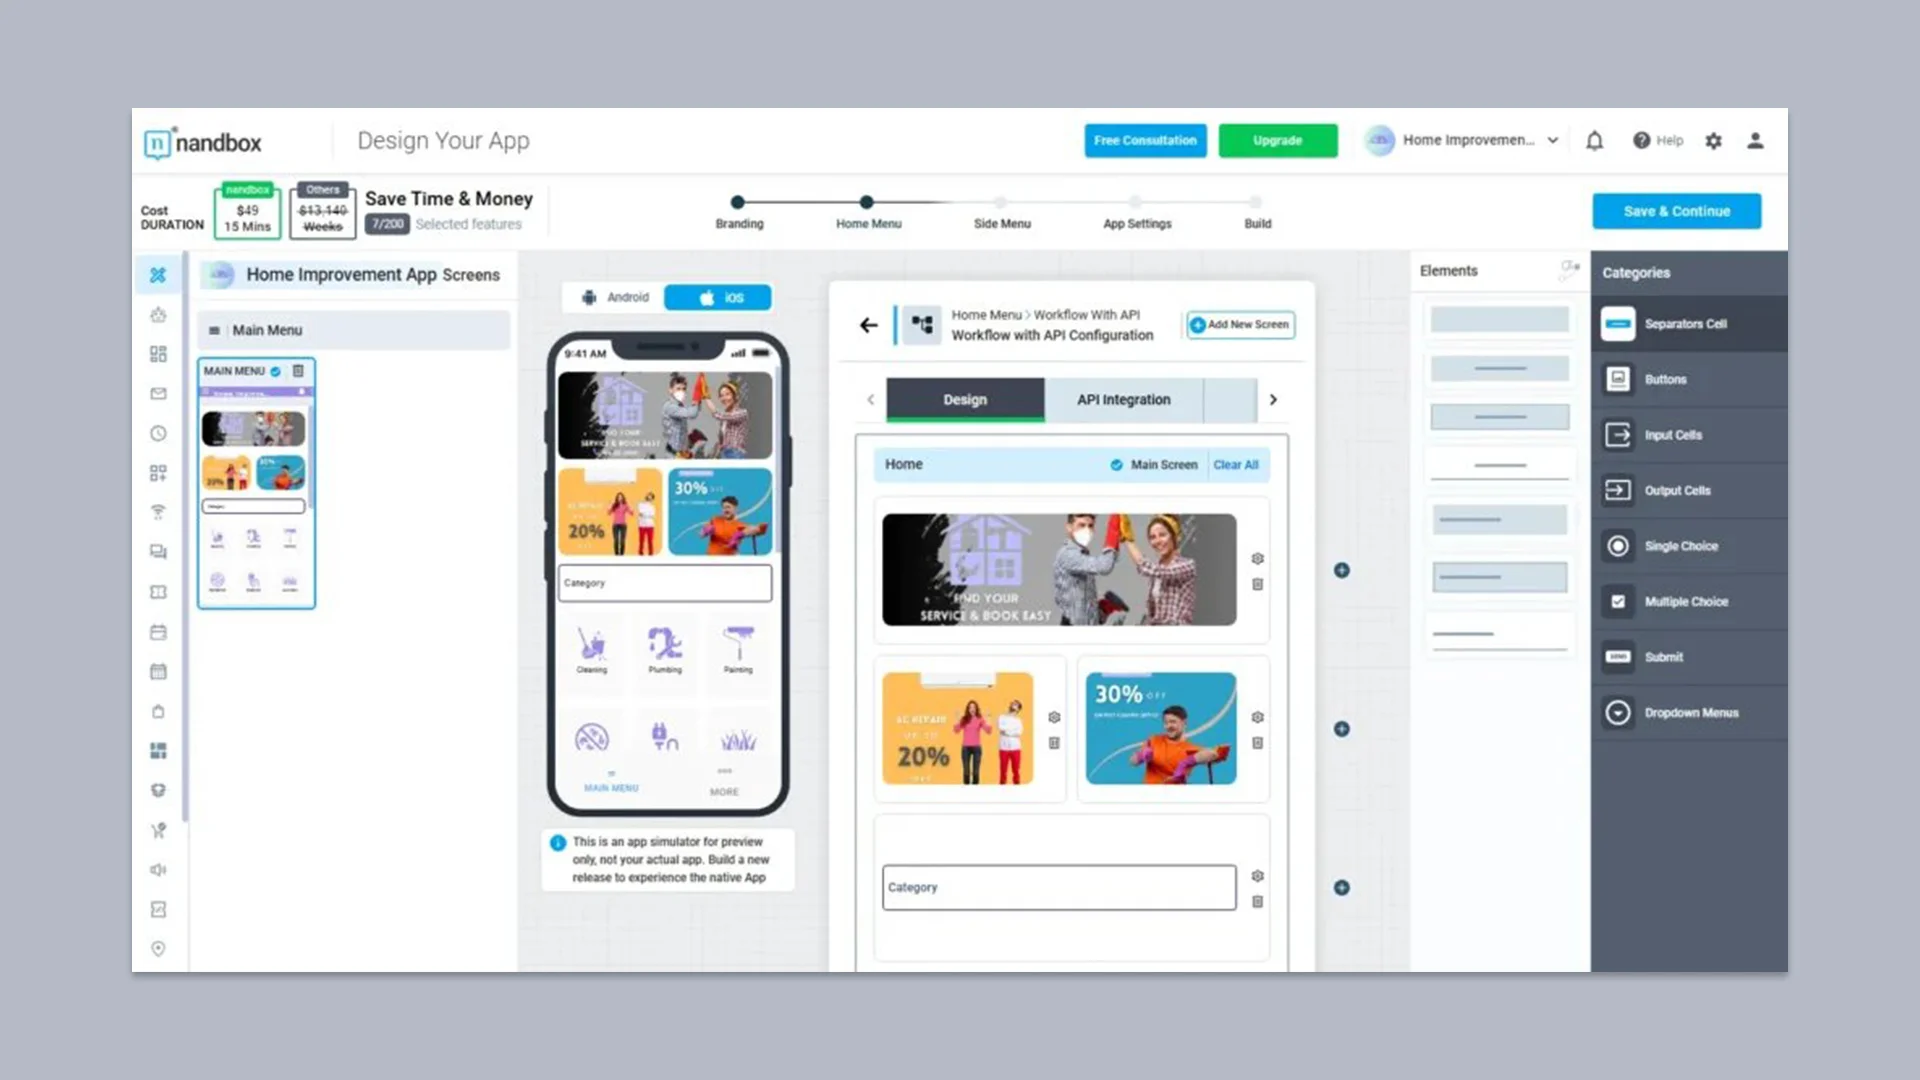
How to Configure the Workflow Module In 10 Steps
- The first step is to add the module to the home menu by dragging and dropping.
- Then, you can design the main screen by adding a button.
- When you click on the gear icon, you can configure the button by writing the title and description.
- Under the action menu, you can decide what happens when users click the button. Choices are a URL, another menu, or another feature. For example, users can access their list of group chats when they click on the button.
- Next, go back and click on add new menu.
- In the following menu, you can add input cells where users can enter information and a submit button.
- Click on the gear icon to write the title and choose the action when users click the submit button.
- You can add more menus with input cells. We don’t recommend adding too many input cells in one menu because users might find it taxing.
- In the final menu, add the output cell to display the information sent by the third-party system, like the school or banking system.
- Click on the gear icon to add a title and description to the output cell.
- Click on Save and generate an APK to test the feature if you have an Android device.
This is just the beginning; the workflow feature is continuously evolving with new features and capabilities. The nandbox app builder is always in progress to remain the best native no-code app builder in the market. Our features speak for themselves here, as the workflow is just one of many capable features like the built-in messenger, customizable store, event manager, and more.
Now that you understand the workflow feature and how to configure it, why not try it yourself? Sign up for the free trial today!