
Integrate your App with Stripe instantly using nandbox App Builder
Stripe Payment Gateway is one of the leading platforms that support online businesses, from startups to enterprises, to secure payments, manage revenues, and achieve sustainable growth. As nandbox, Stripe ensures scalability and reliability with its cloud-based infrastructure.
At nandbox, no-code is the norm; by drag-and-drop and data insertion, you can create and update your Native App in minutes. And you can integrate payment gateways in your shopping app or booking & events app created by nandbox App Builder.
How to integrate Stripe Payment Gateway in your Shopping App in Four Steps
Step 1
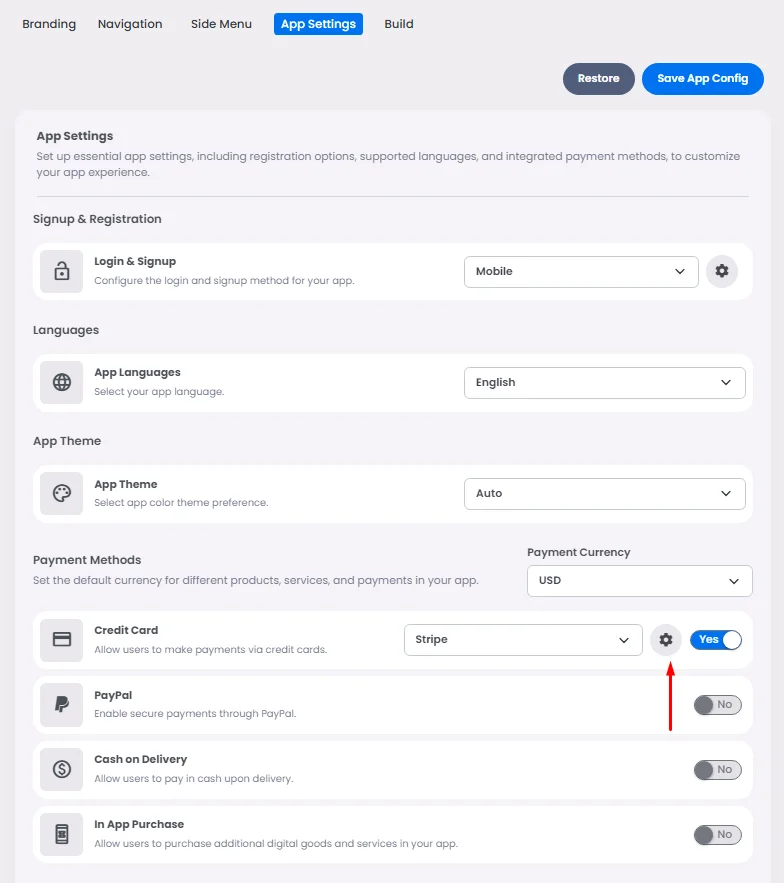
The feature configuration is found in the App Settings page. Scroll down until you reach the payment methods section, turn Credit Card (Stripe)’s toggle on, and click the gear icon to access it’s setting.
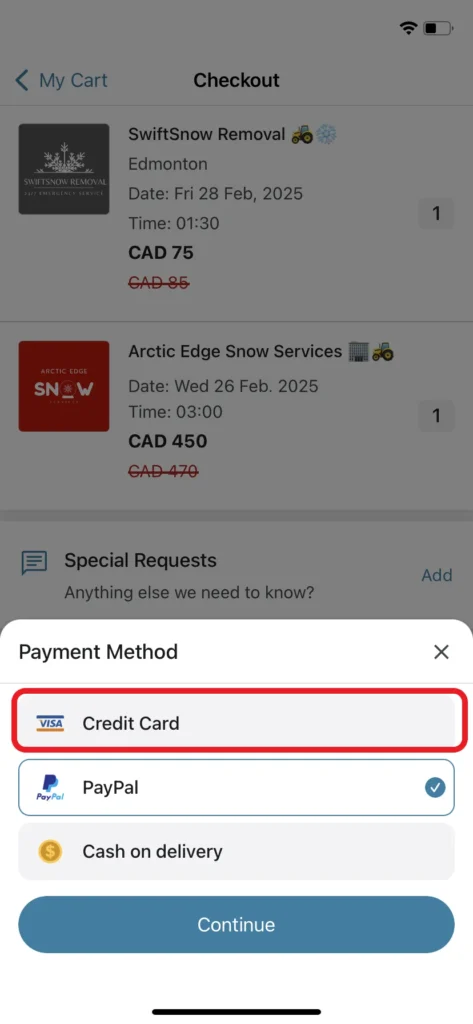
Once you enable Stripe in your app, it will be automatically integrated as the main payment gateway if you did not install any other payment gateway; if you did, it will give the user the option to choose which payment gateway to proceed with as follows:
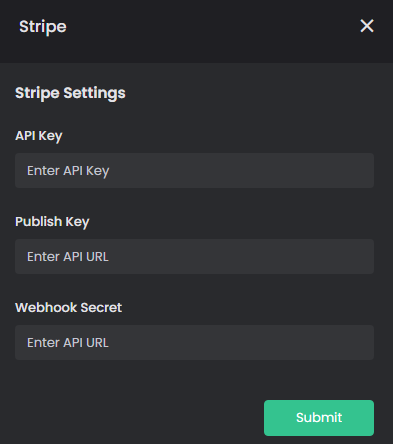
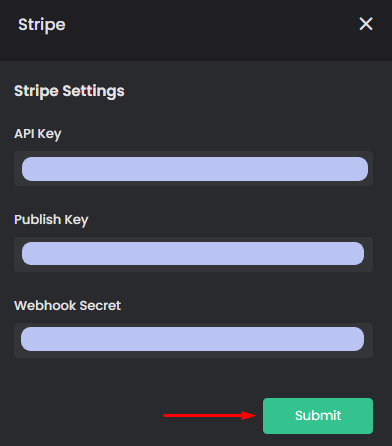
You will find three pieces of information are required to complete your payment integration process:
- API Key
- Publish Key
- Webhook Secret
This data is accessible from your Stripe account. So go to Stripe either to sign up or log in.
Step 2
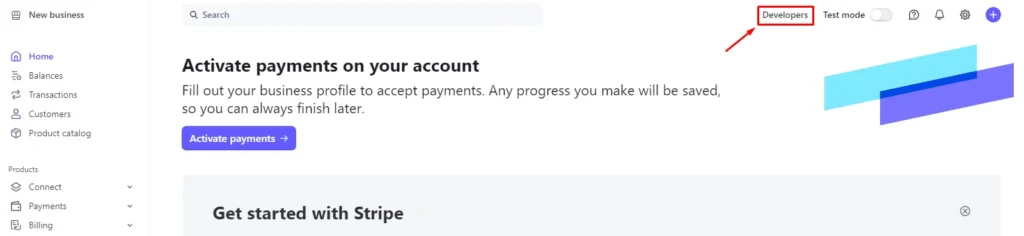
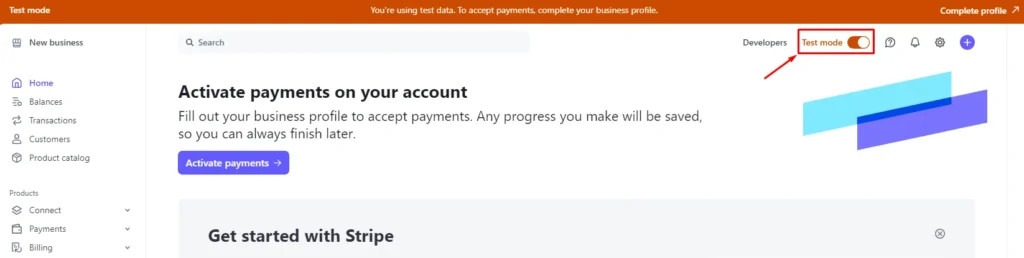
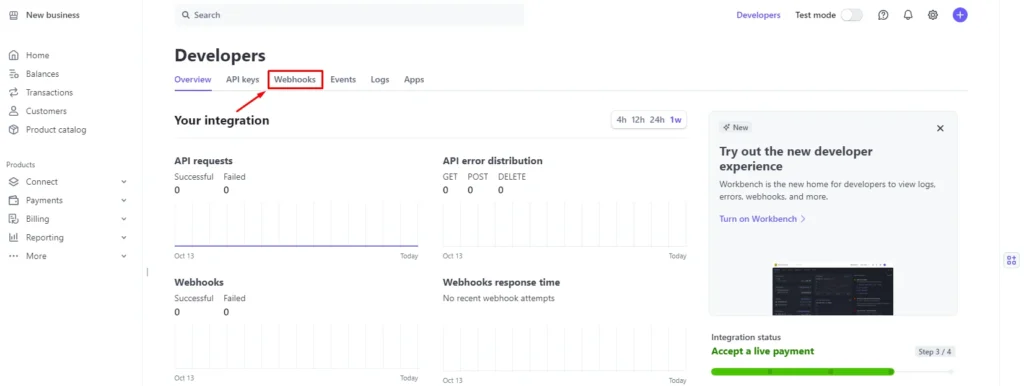
Go to your Stripe’s dashboard and click ‘Developers’.
Note that you can enable the Test mode toggle for testing your payments and disable it for Live mode if you’re ready to launch your app.
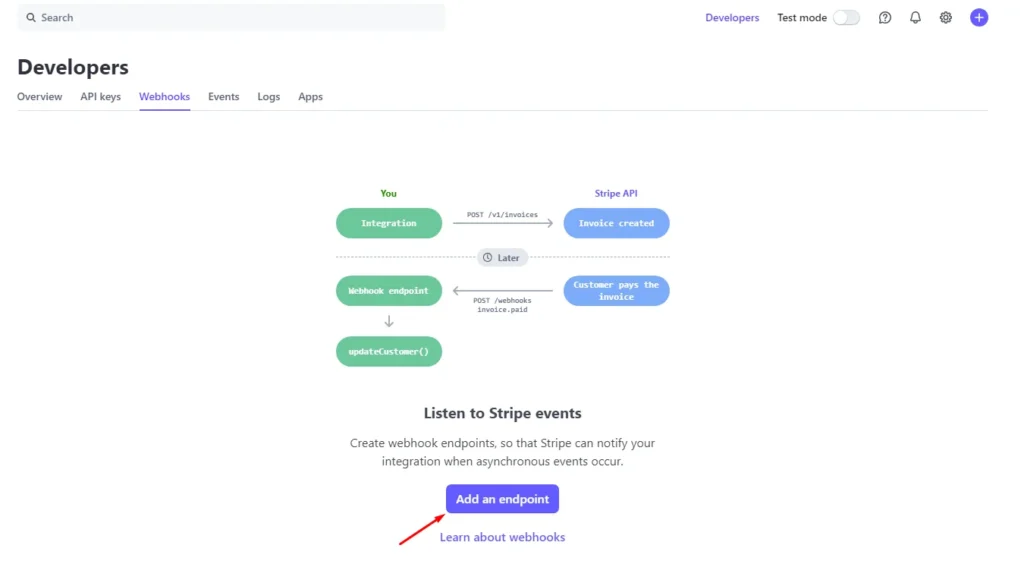
Click ‘Webhooks’.
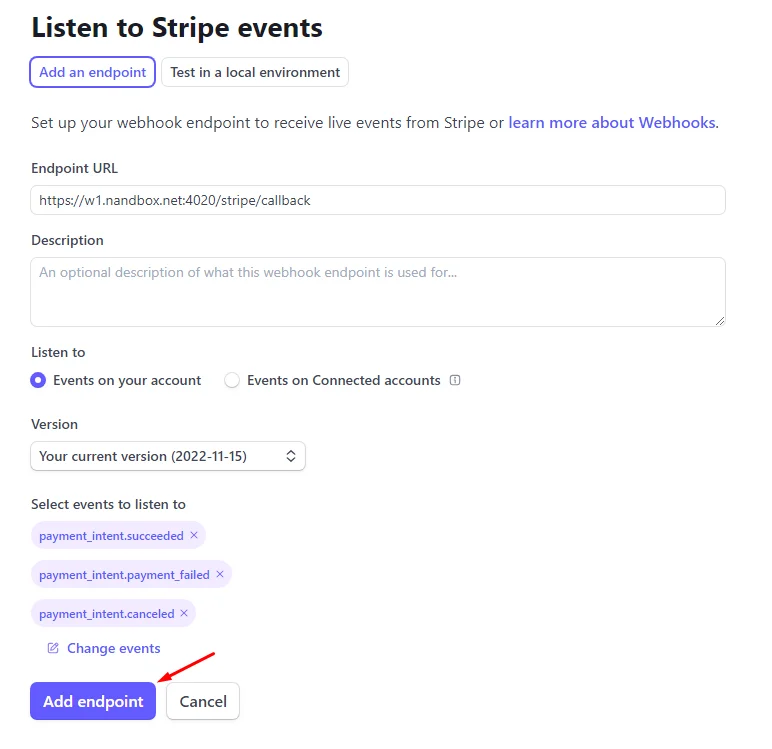
Then click ‘Add an endpoint’.
A screen will pop up with the required information:
- Endpoint URL
- Select events
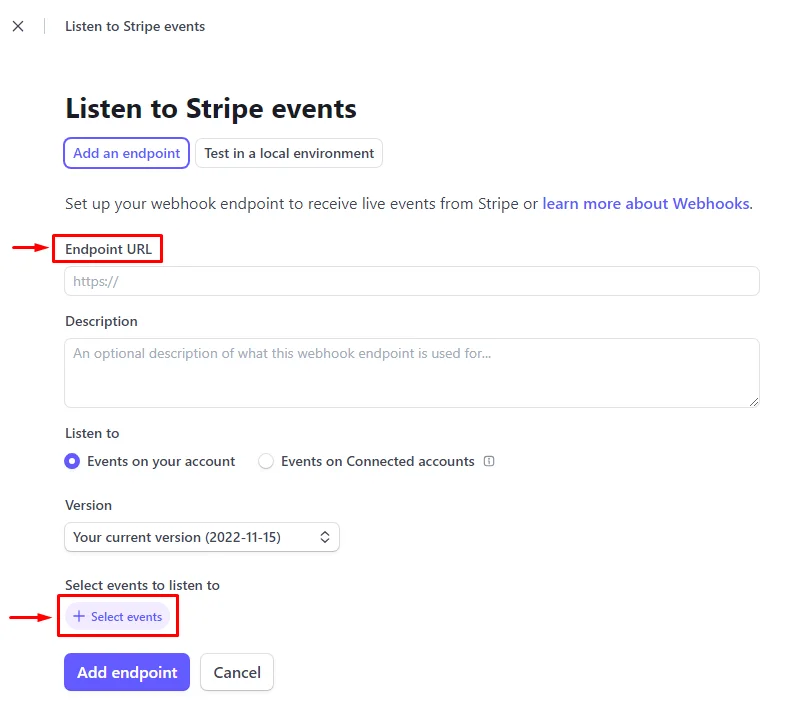
Paste this endpoint URL: https://w1.nandbox.net:4020/stripe/callback and add these three events to its event details:
- payment_intent.succeeded
- payment_intent.payment_failed
- payment_intent.canceled
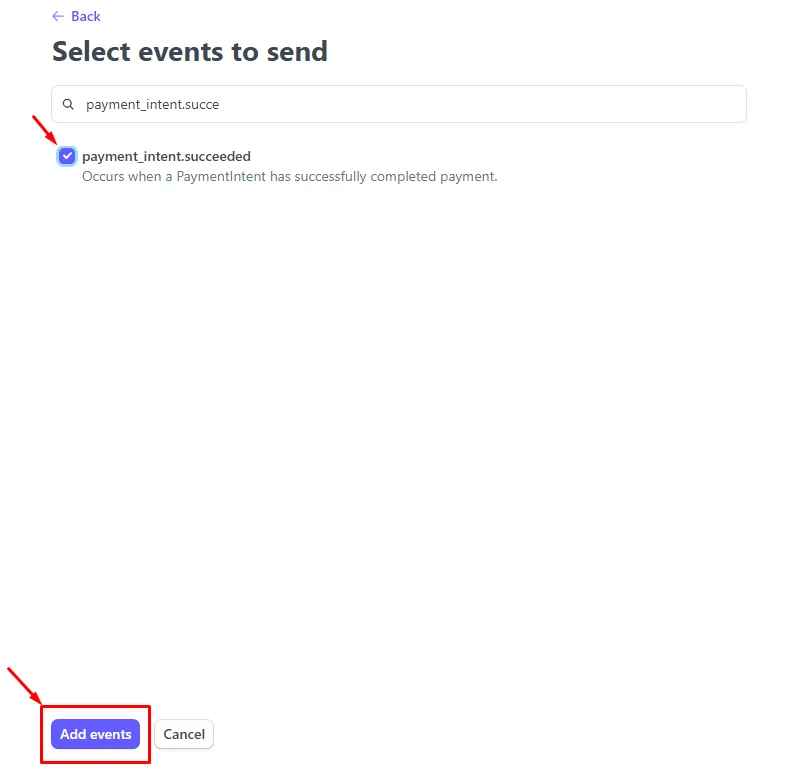
Then click ‘Add endpoint’.
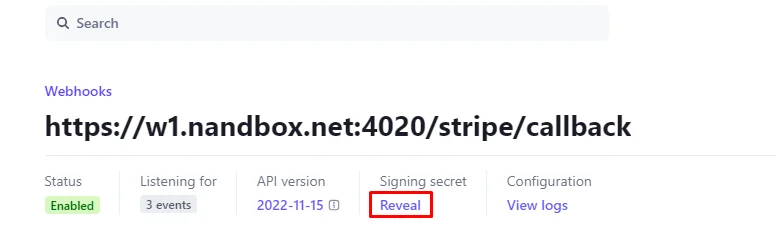
Step 3
Once endpoint added, click ’Reveal’ the signing secret in order to get your ’Webhook Secret’.
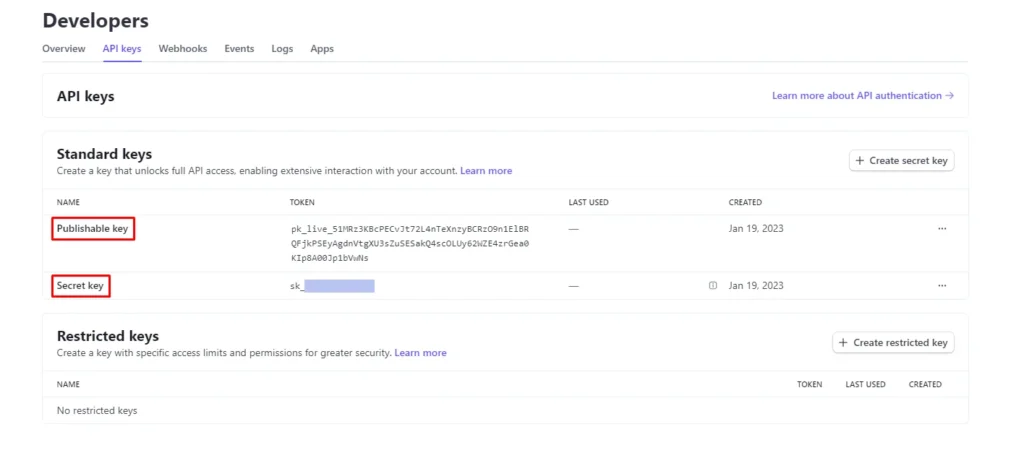
Now go back and click ‘API keys’ to get your Publishable Key and Secret Key.
Step 4
Copy and paste all of the above into your builder’s Stripe settings and click ‘Submit’.
Now, your e-commerce app should be linked with Stripe Payment Gateway. If you have questions or need help, please contact us at support@nandbox.com.