Introduction
PayPal is the most used online wallet in the world. It can be used as a payment gateway in your store or channel where users can submit payments easily. This article will show you how to integrate PayPal into your app.
This feature is the best to use if you want to build an e-commerce app or booking & events app.
Installation
The feature configuration is found in the App Settings page. Scroll down until you reach the payment methods section, turn PayPal’s toggle on, and click the gear icon to access it’s setting.
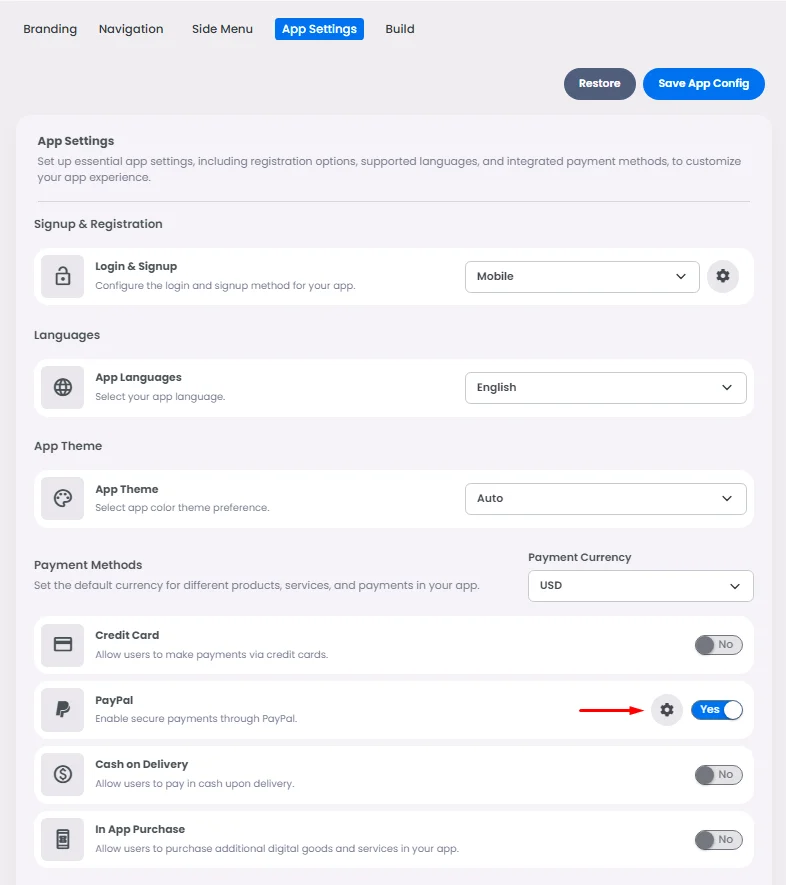
Once you configure this feature in your app, it will be automatically integrated as the main payment gateway if you did not configure any other payment gateway; however, if you did, it will give the user an option to choose which payment gateway to proceed with as follows:

Main Features
The PayPal feature is a payment gateway; once you integrate PayPal with your app, users can use it to pay for items in your store, subscriptions on your channel, or paying for online appointments and events.
Users have to have a PayPal account in order to be able to complete the online transaction using the PayPal feature.
Configuration
Now we need to fill in the required information in PayPal’s settings:
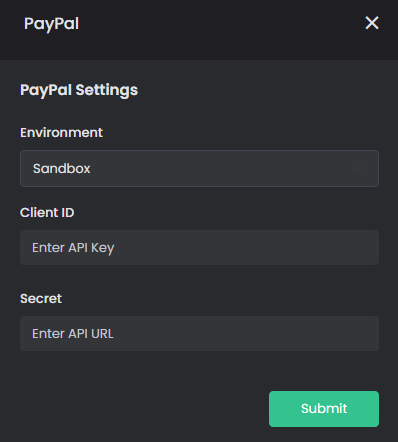
- Choose ‘Sandbox’ if you are testing your payments and want to make sure everything is running smoothly.
- Choose ‘Production’ if you are ready to go live.

For the ‘Sandbox’ option, you will need to create a PayPal Business Account.
Note that before you sign up to a new PayPal business account, make sure that the country you select is the country where your business is located by clicking on the country’s flag and selecting your country.
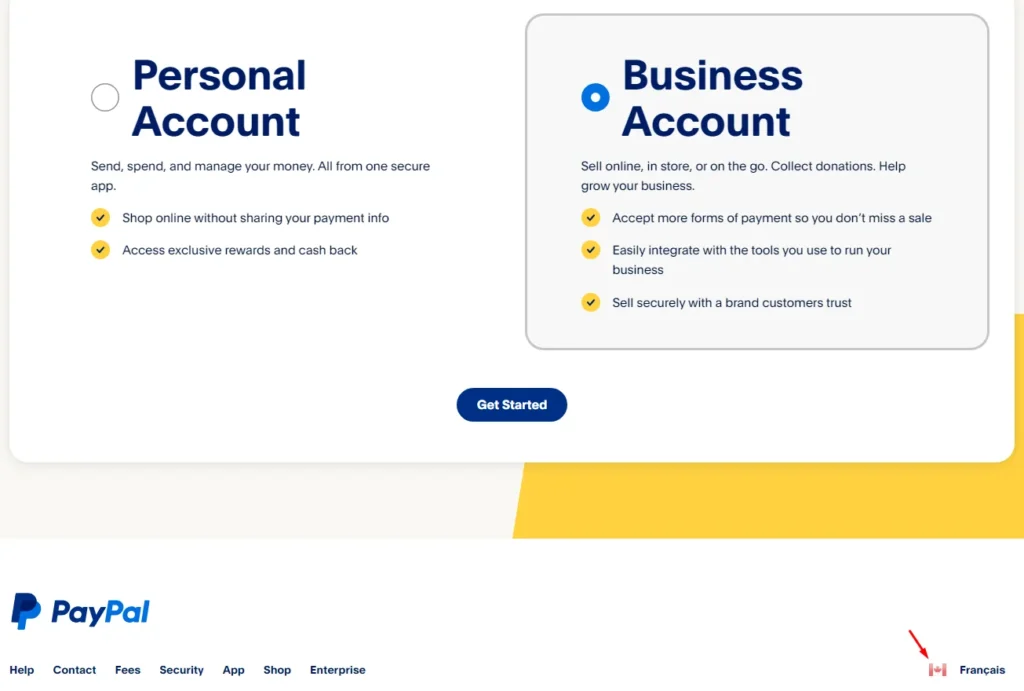
Create PayPal Business Account
Go to the following link and select Business Account, then follow the steps.
Create Sandbox Account: How to Get Your PayPal Credentials [Client ID, Client Secret]?
Note that these steps are also for making test payments later.
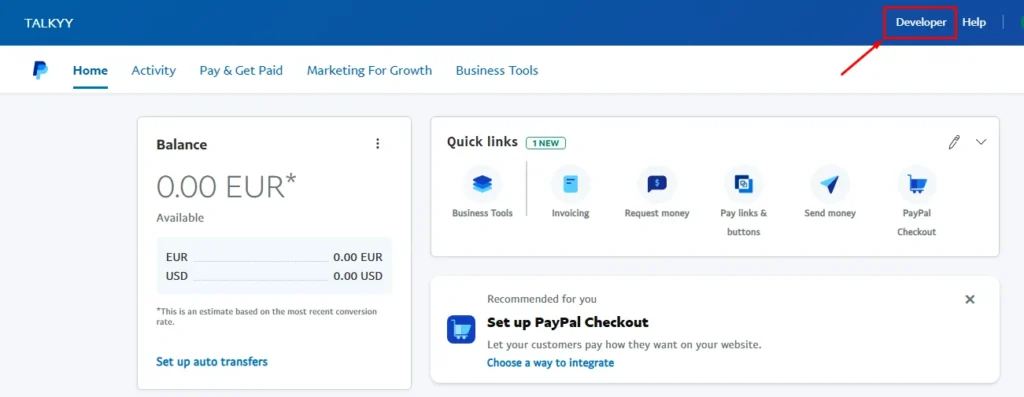
1. If you already have an account and you just signed in, go to the top-right and click ‘Developer’.
2. If you have just signed up, you will be landed on your developer account dashboard automatically.
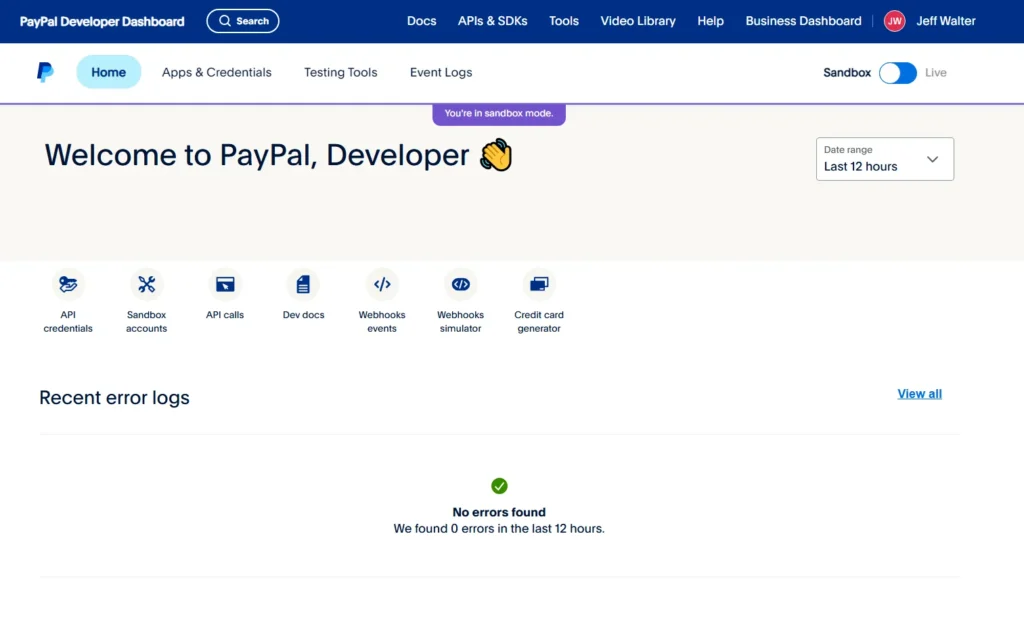
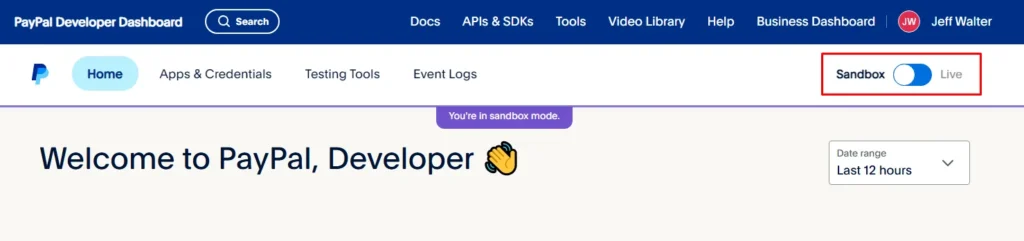
3. Make sure that your dashboard is in sandbox mode.
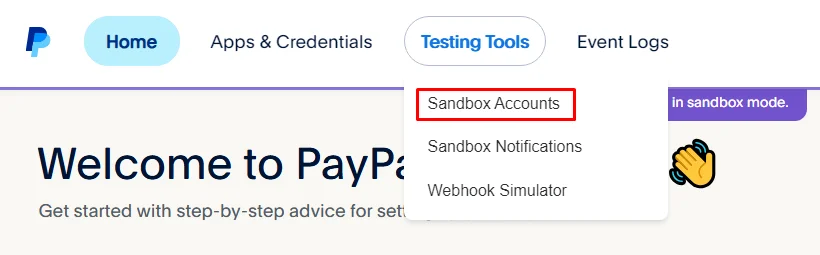
4. Go to ‘Testing Tools’ and click ‘Sandbox Accounts’.
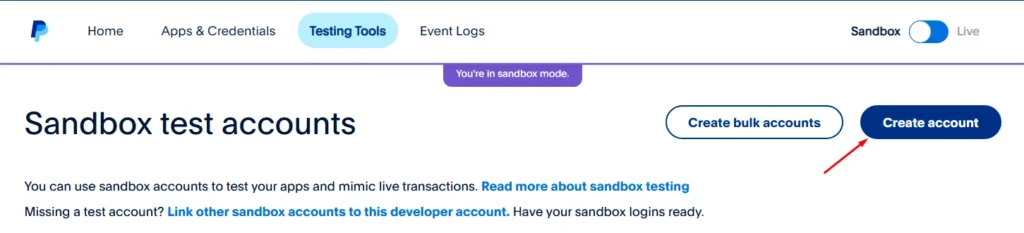
5. Click ‘Create Account’.
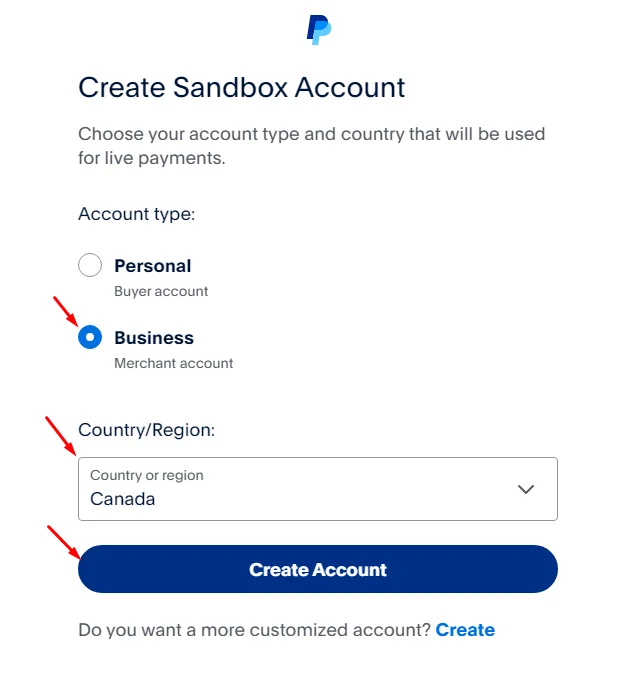
6. Choose ‘Business’ and select region, then click ‘Create’.
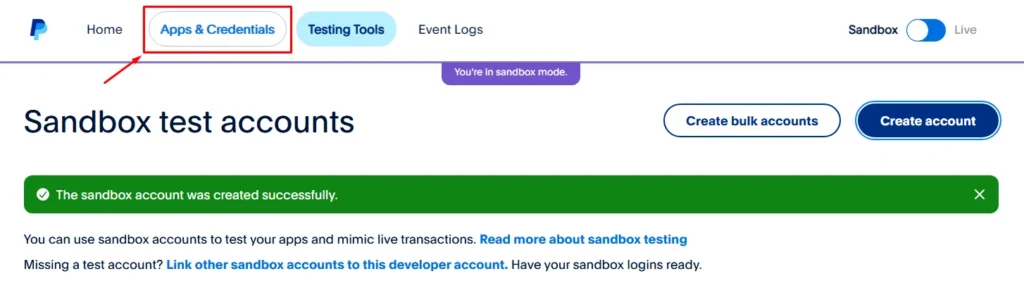
After making your sandbox account:
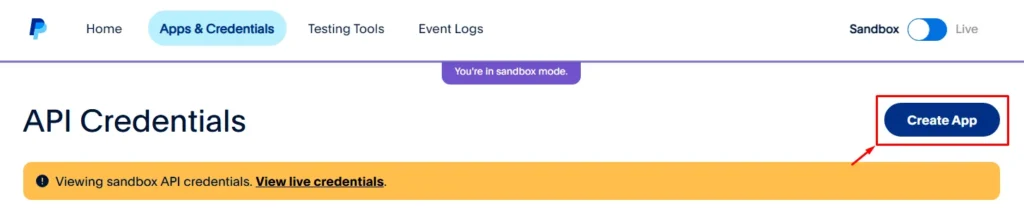
7. Firstly, go to ‘Apps & Credentials’.
8. Click ‘Create App’.
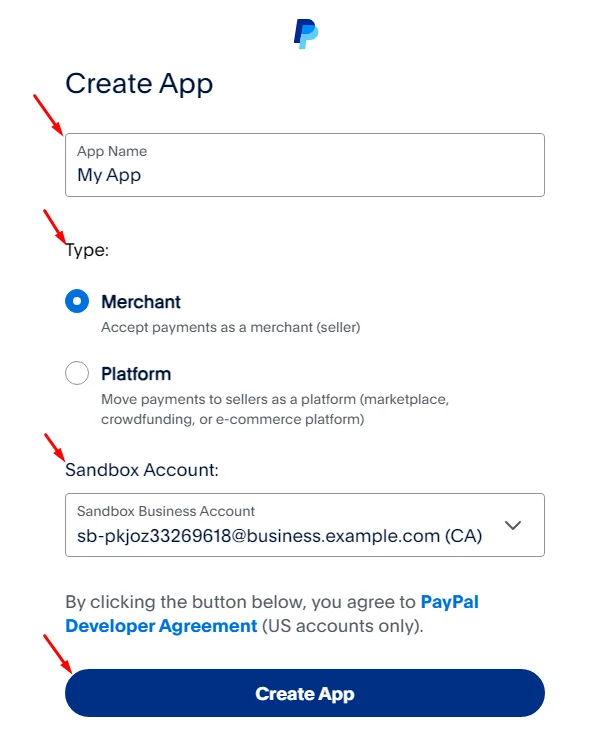
9. Then fill in the required app details:
- App name.
- App Type: Merchant or Platform.
- App type [Merchant – Platform]
- The sandbox account you created
⇒ Choose ‘Merchant’ if your app is a self-owned app.
⇒ Choose ‘Platform’ if your app is integrated with other enterprises (useful for e-commerce apps, shopping hub component, booking & events center component).
Then click ‘Create App’.
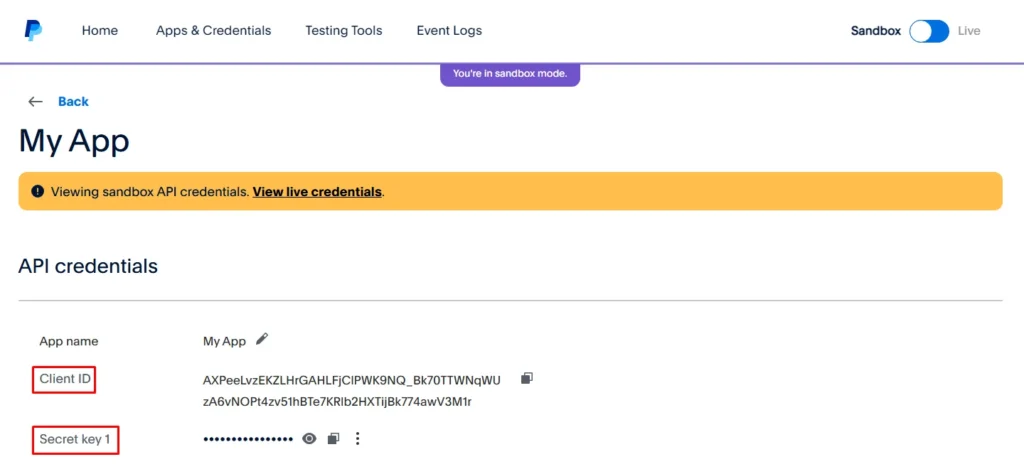
10. A screen will pop up with your Client ID and Client Secret as well. Copy both of them.
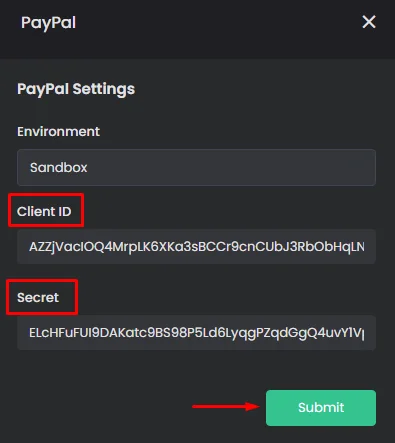
11. And paste them in their right places, then click ‘Submit’.
Recommended Components
-
Shopping Hub: It allows you to create a full-store where you can display your products and collections.
-
Channels: Channels allow you to post messages, images, videos, and files. With the option of targeting and segmentation, you can also charge your users for a monthly subscription to your channels.
-
Bookings & Events: A component that allows users to book events and appointments from your app.