Start Sending Push Notifications Instantly!
A push notification is the message that pops up on digital screens. It varies in content; it might be, for instance, a chat message, an event invitation, or a reminder. In the coming lines, you’ll know how to enable your iOS mobile app, created on nandbox App Builder, to send push notifications in six steps.
As a reliable communications channel, push notifications have become crucial to getting integrated into mobile apps. It wakes the app in the background, alerts the users, and keeps them engaged.
Since your app is built with nandbox, all modifications and add-ons require no coding knowledge. Only with drag and drop and the insertion of simple information will your native app run seamlessly with tons of features on iOS and Android devices.
What is nandbox App Builder?
nandbox is a Canadian mobile app development platform, established in 2016. The SaaS platform has developed a no-code mobile app builder, which enables everyone to make mobile apps with best-in-class capabilities. With nandbox App Builder, you can build personalized, native, hosted-ready mobile apps with simple drag-and-drop. Neither coding nor upfront costs are needed, but a 7-day free trial and lifetime app support are.
To enable the iOS version of your nandbox-built app to push notifications, create the push notifications key and submit the file and ID on the nandbox Native Builder dashboard. Hence, the nandbox Team will then configure your Apple Push Notification Service (APNs) and allow your app to send push notifications.
How to create a push notification key to enable your iOS mobile app to send push notifications
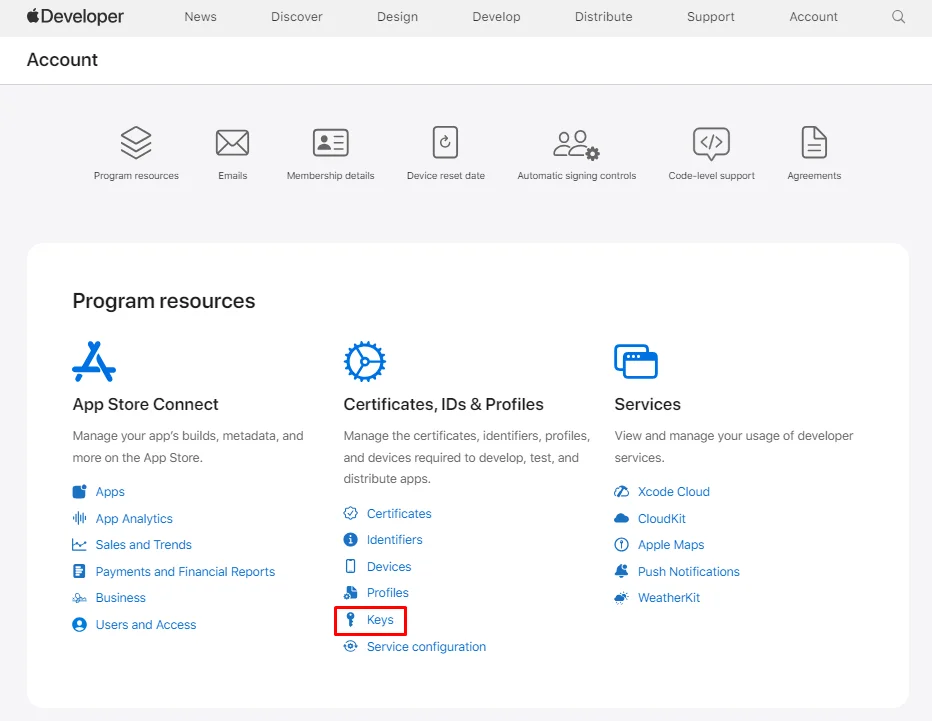
1. Navigate to Apple Developer and log in to your account.
2. Click ‘Keys.’
3. Click the (+) icon.
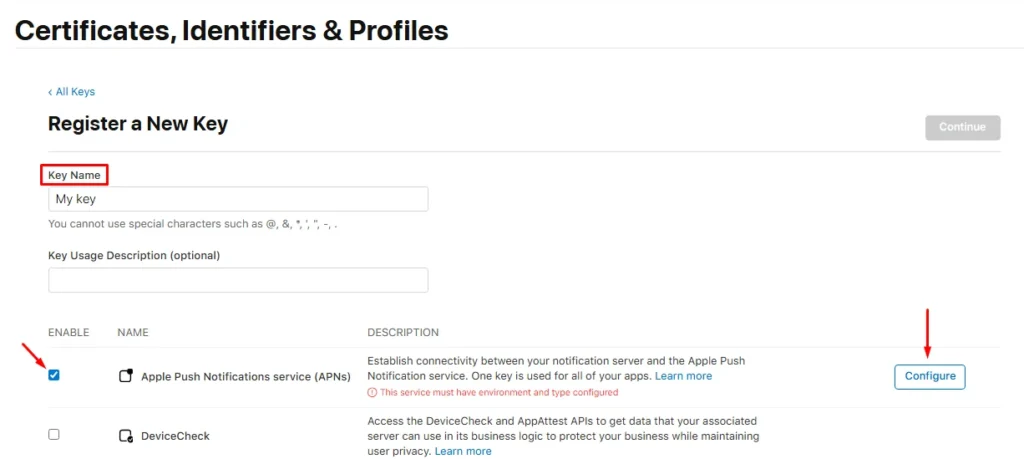
4. The page ‘Register a New Key’ will open. Insert a name for your key and mark ‘APNs,’ then click ‘Configure.’
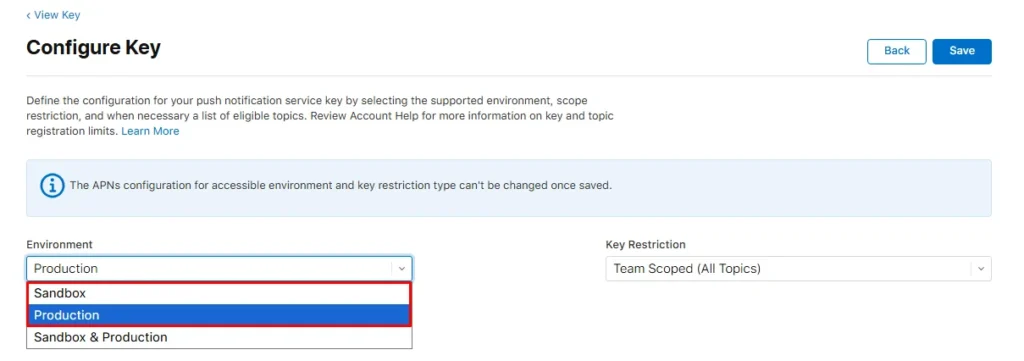
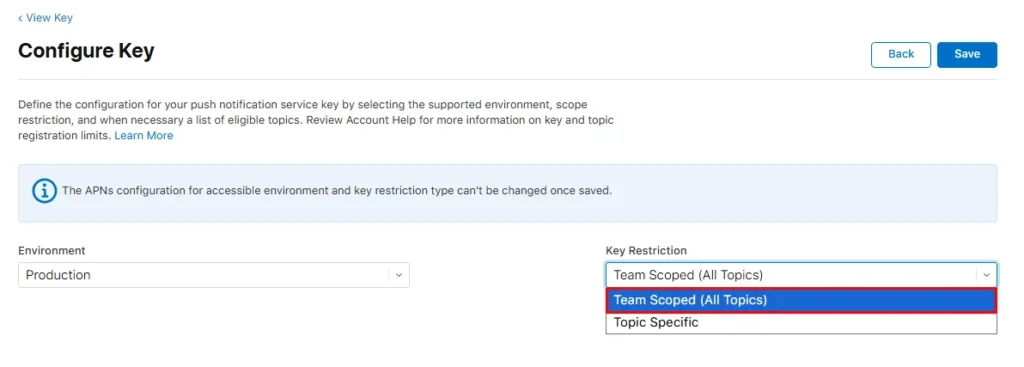
5. On the Configure Key page you will see Environment & Key Restriction dropdowns:
Environment
- Production: Choose this if your app is live / publicly distributed.
- Sandbox: Choose this if you’re only testing on internal devices with development.
Key Restriction
Always select Team scoped (All Topics).
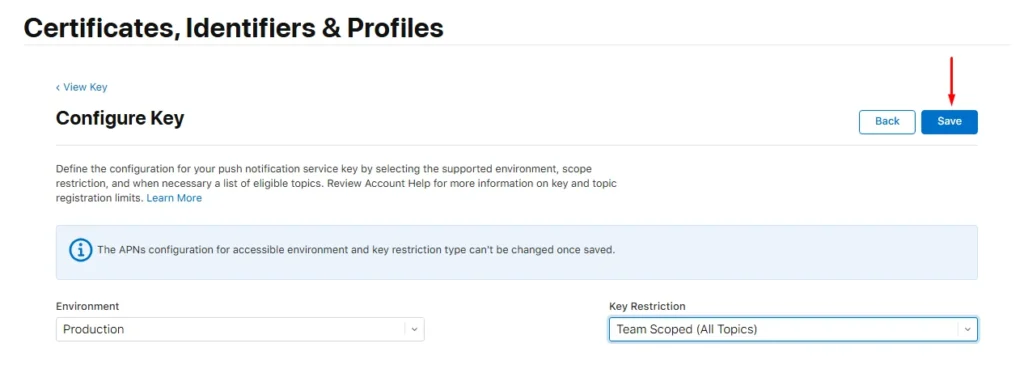
6. Then click ‘Save.’
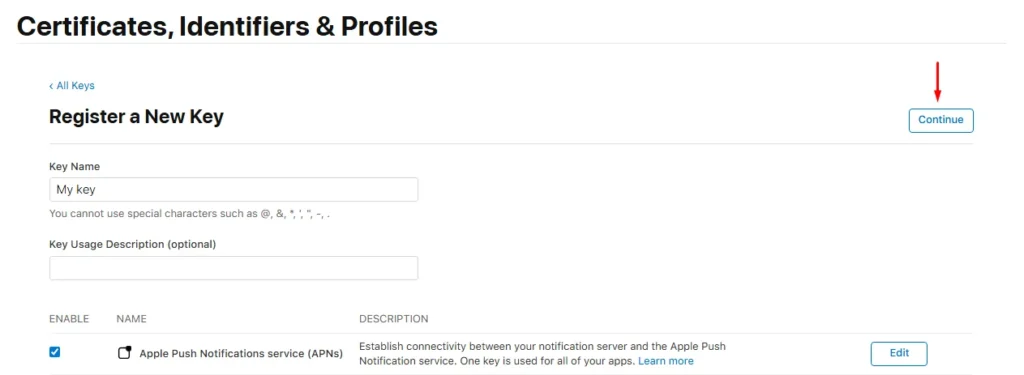
7. Back to the ‘Register a New Key’ page, click ‘Continue.’
8. And finally, click ‘Register.’
9. Download the key file, and don’t forget to save the key ID.
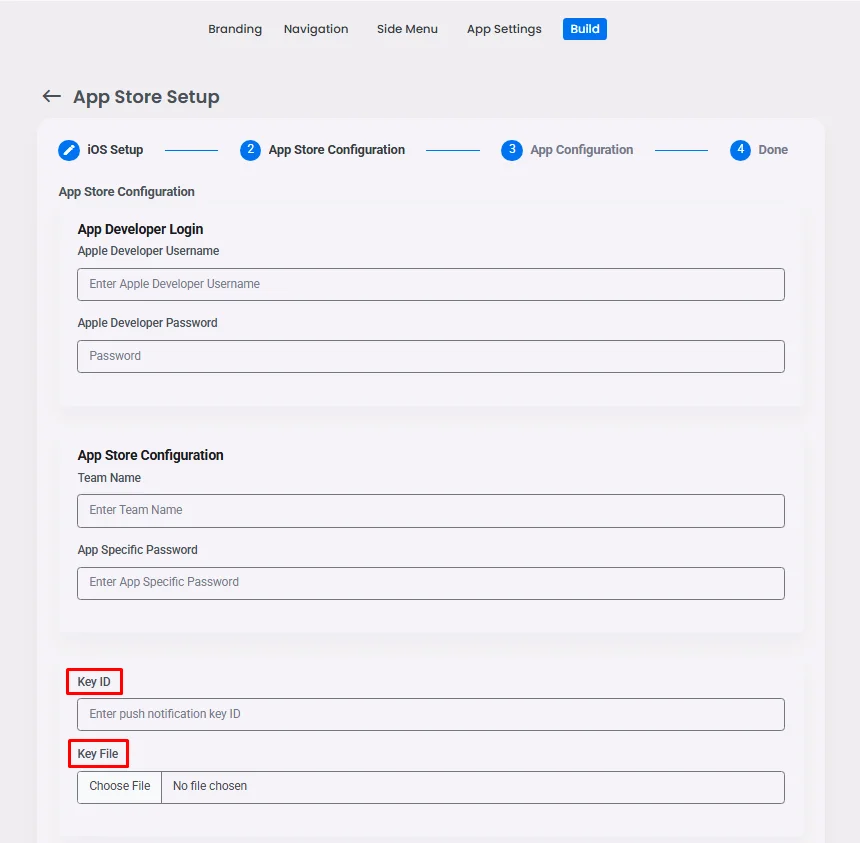
10. Upload the key file and insert the key ID on the nandbox Native App Builder dashboard. On the dashboard, go to Release in step number eight, then click on Publishing Info that is placed on the right.
Your app built with nandbox Native App Builder will bring your business a new level of engagement and visibility. You can send push notifications limitlessly, no matter what pricing plan you are on.
However, we recommend you consider your notification’s target segment, the timing of pushing it, and the relevance of its content.
If you have questions or you need help, please contact us at support@nandbox.com.
