The final step of developing an app is bringing it to light. There’s no better way to incite downloads than publishing it on an official store, like the Google Play Store or the Apple App Store. They both add layers of protection that provide users with security. Users don’t think twice before downloading an app from both official stores. That’s why we created this guide to show you how to publish an app on the Google Play Store and the App Store if you’re using the nandbox app builder for your app demo account setup.
The Demo Account
If your application has an authentication system for logging in via email or phone number, you should provide both Google and Apple with a demo account that includes a login and password. nandbox represents the Demo Account feature, which helps you create your demo account to accomplish the mission.
Important consideration must be given to the demo account before publishing your app, as Google and Apple Store might reject your submission for skipping this step. Both Google’s Play Store and Apple’s App Store might reject your submission for skipping this step, so they require a demo account for any app that has login functionality to review them for several reasons:
- Content Checking: They must ensure the app’s content meets store guidelines. This includes checking for inappropriate or harmful content, age-appropriateness, and deception.
- Security: The app must be secure. It must be malware-free and secure user data.
- Advertisements and Purchases: They must be able to verify that in-app purchases and ads comply with store policies.
- App Functionality Verification: All app features must be tested, not just the login screen. They must interact with as many as possible to prevent fraudulent or harmful apps from being published and maintain app store quality.
How It Works!
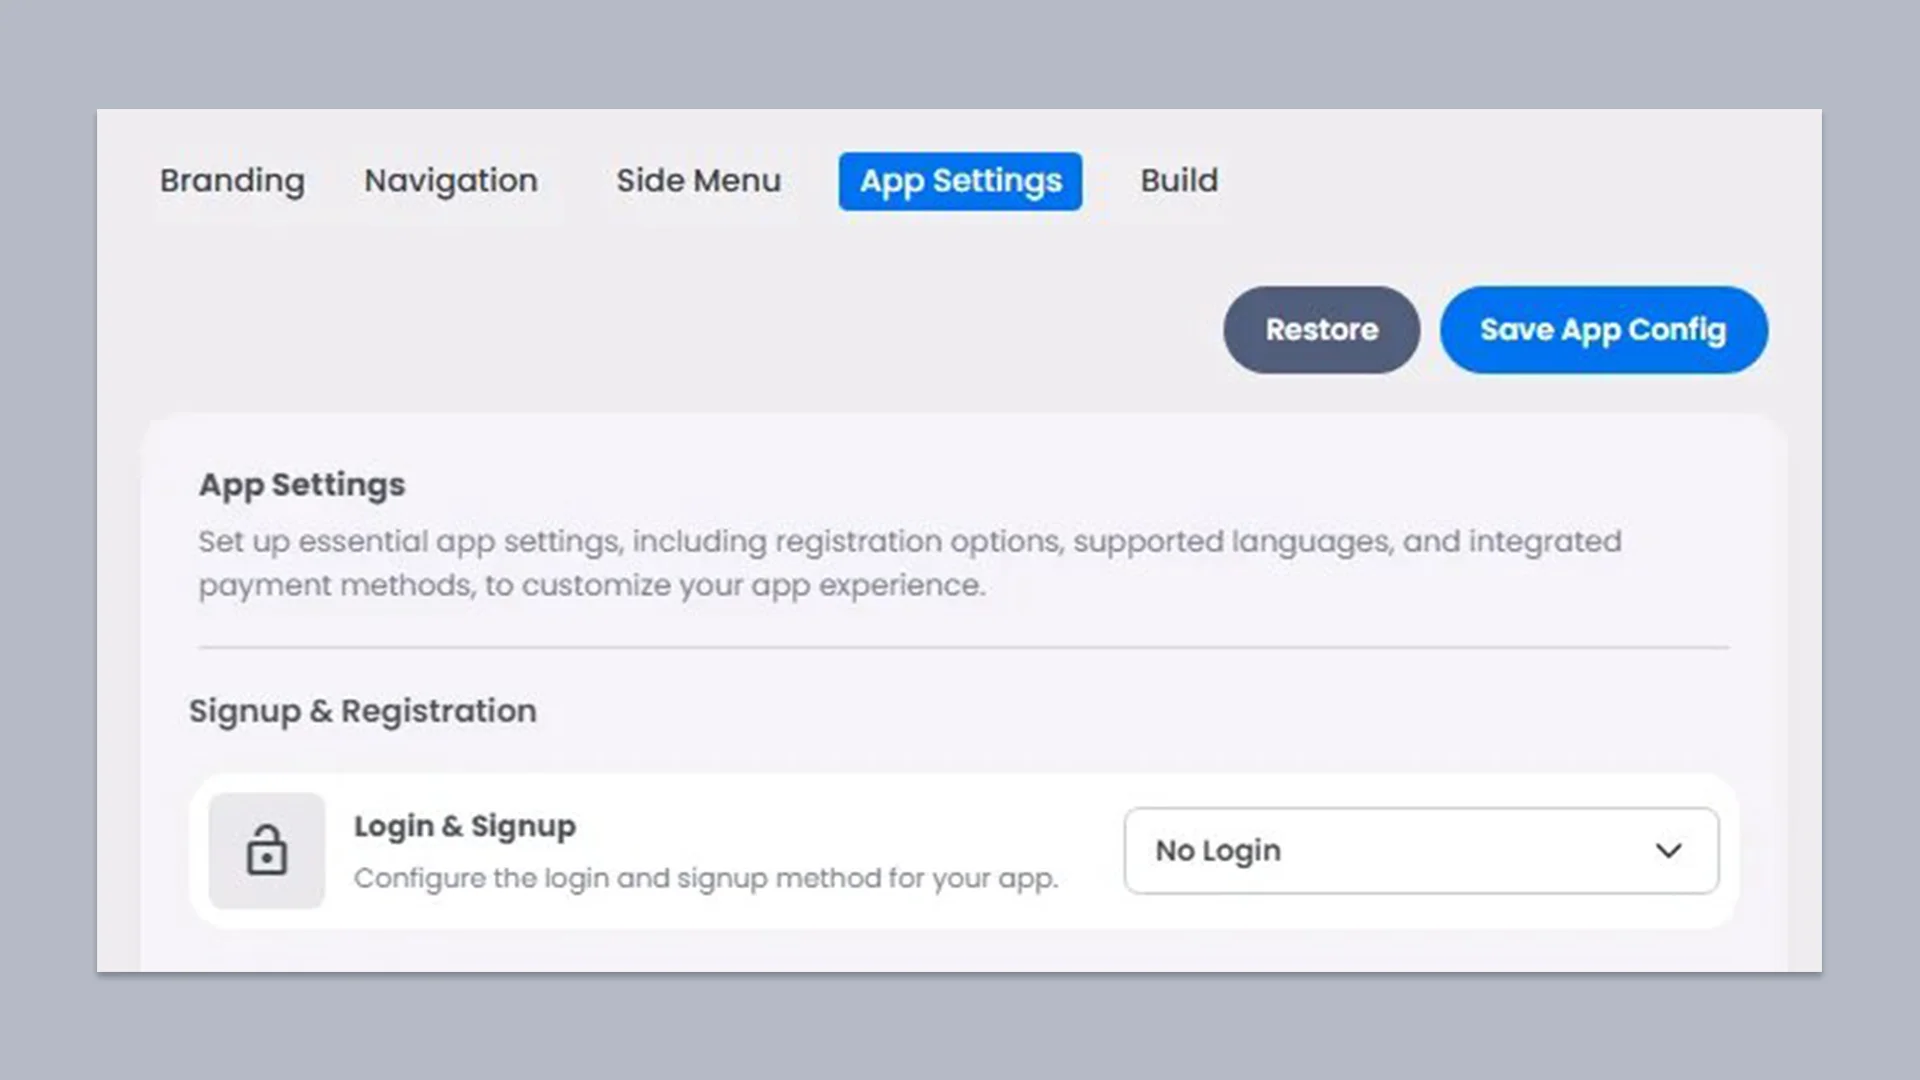
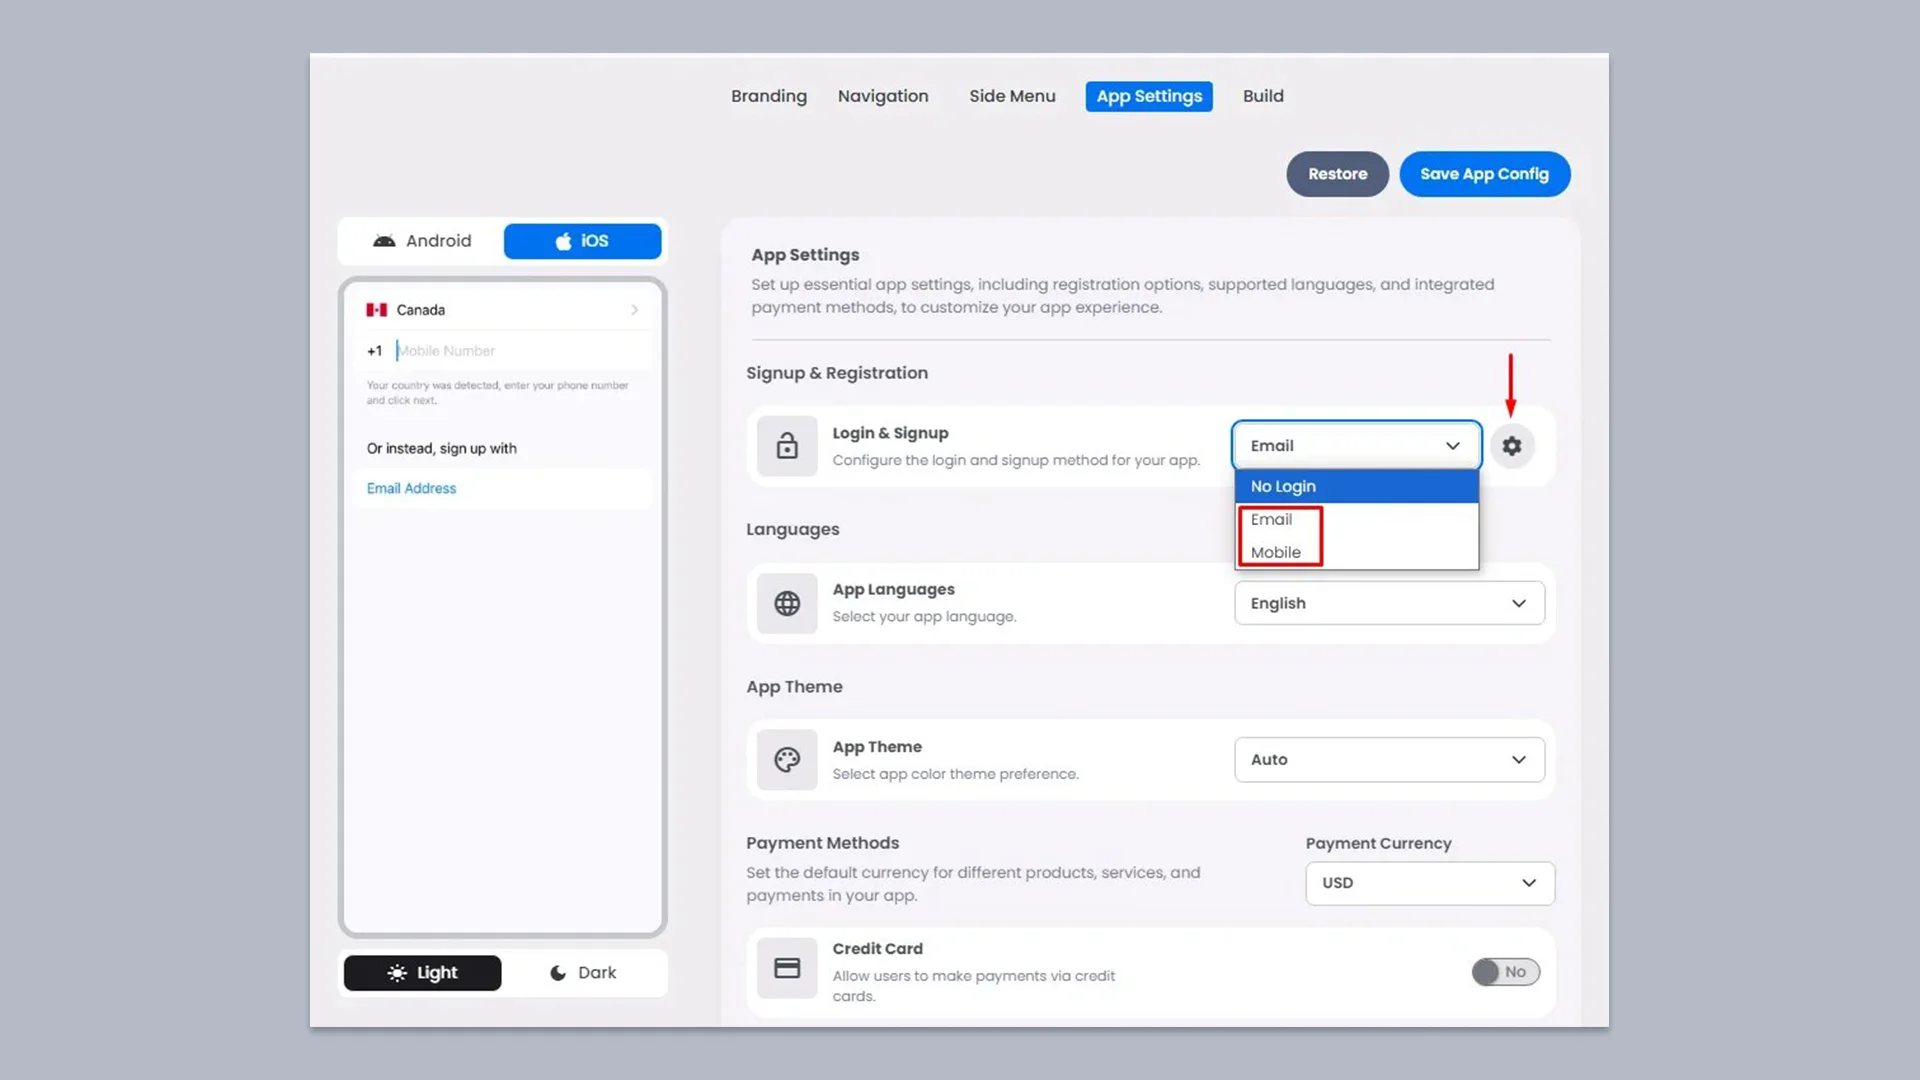
In the App Settings page, scroll down till you find the Signup & Registration section. Click the arrow to configure a login method in your app.
The builder supports two methods: either via Email or Mobile. Choose the right one for your app and complete your configurations.
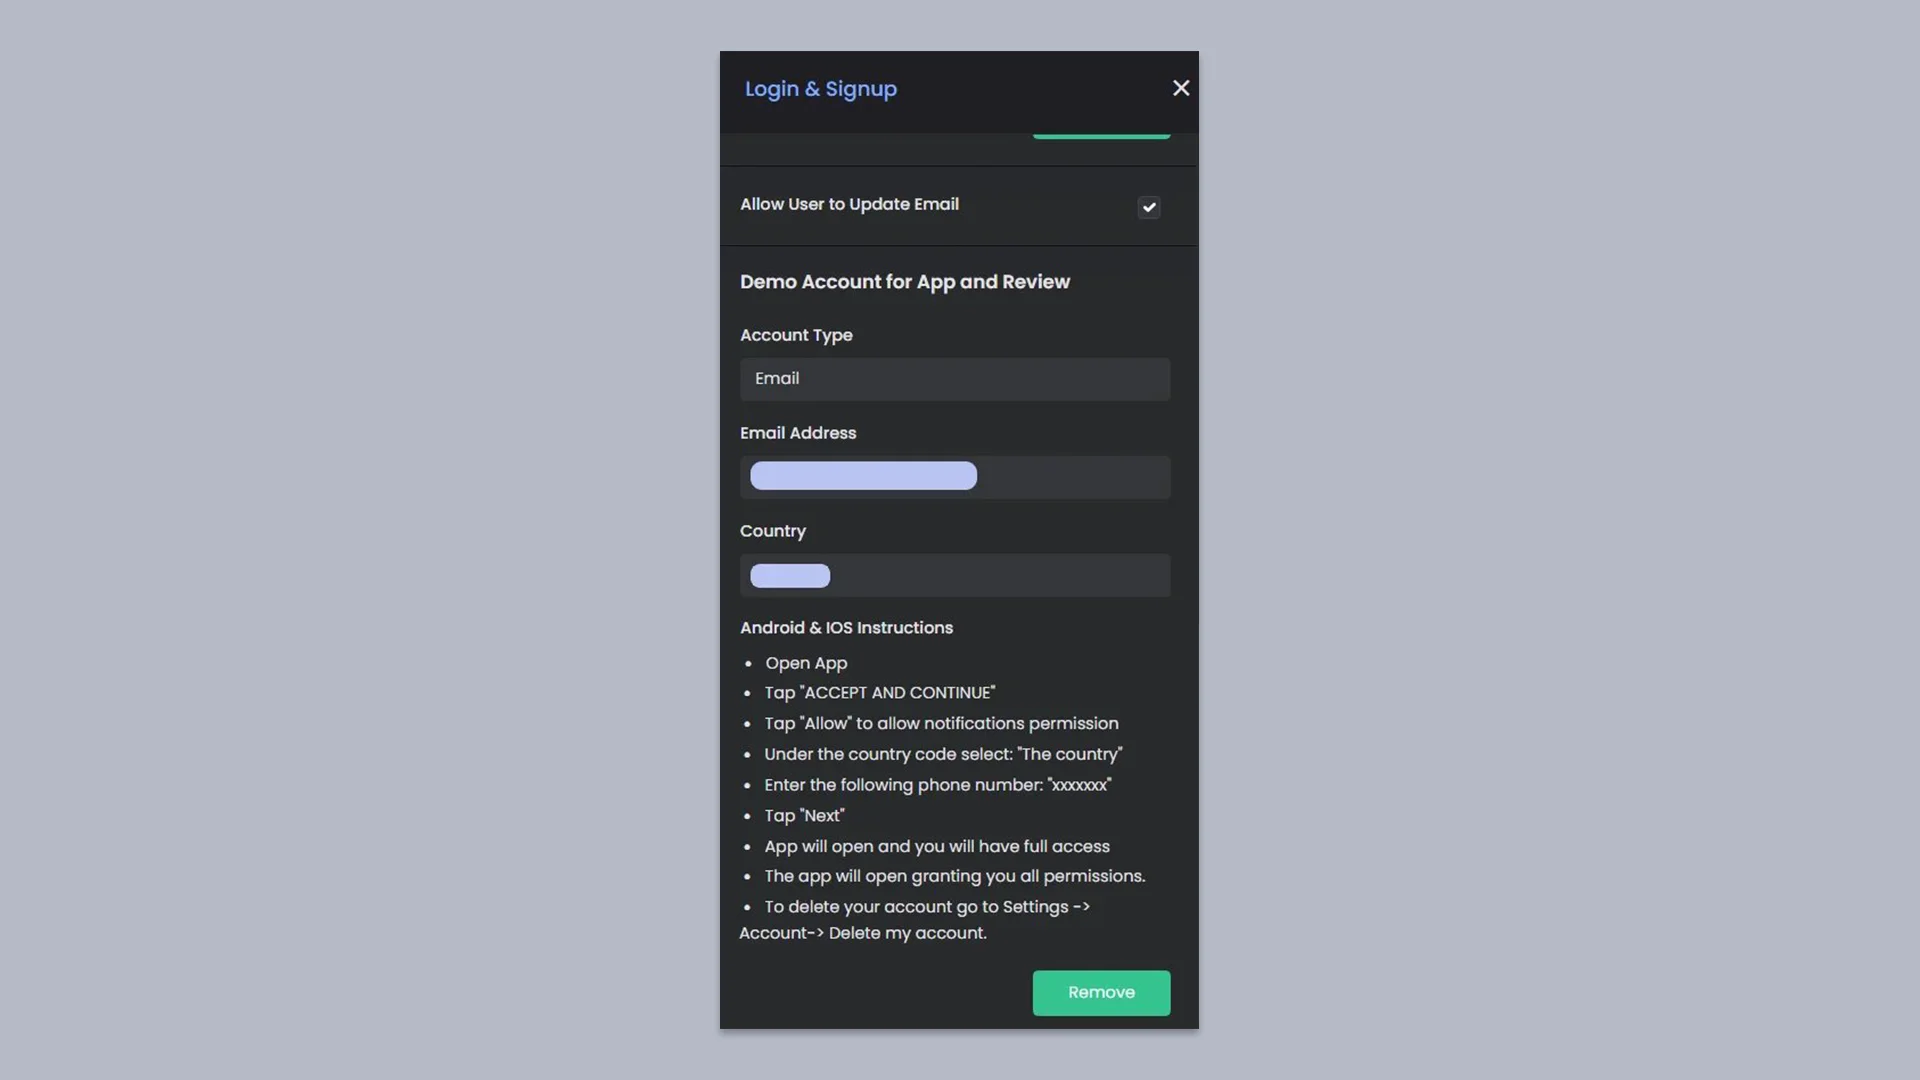
Here comes the role of the app demo account setup. After filling in your login registration method settings, the builder will generate the demo account used in your app review.
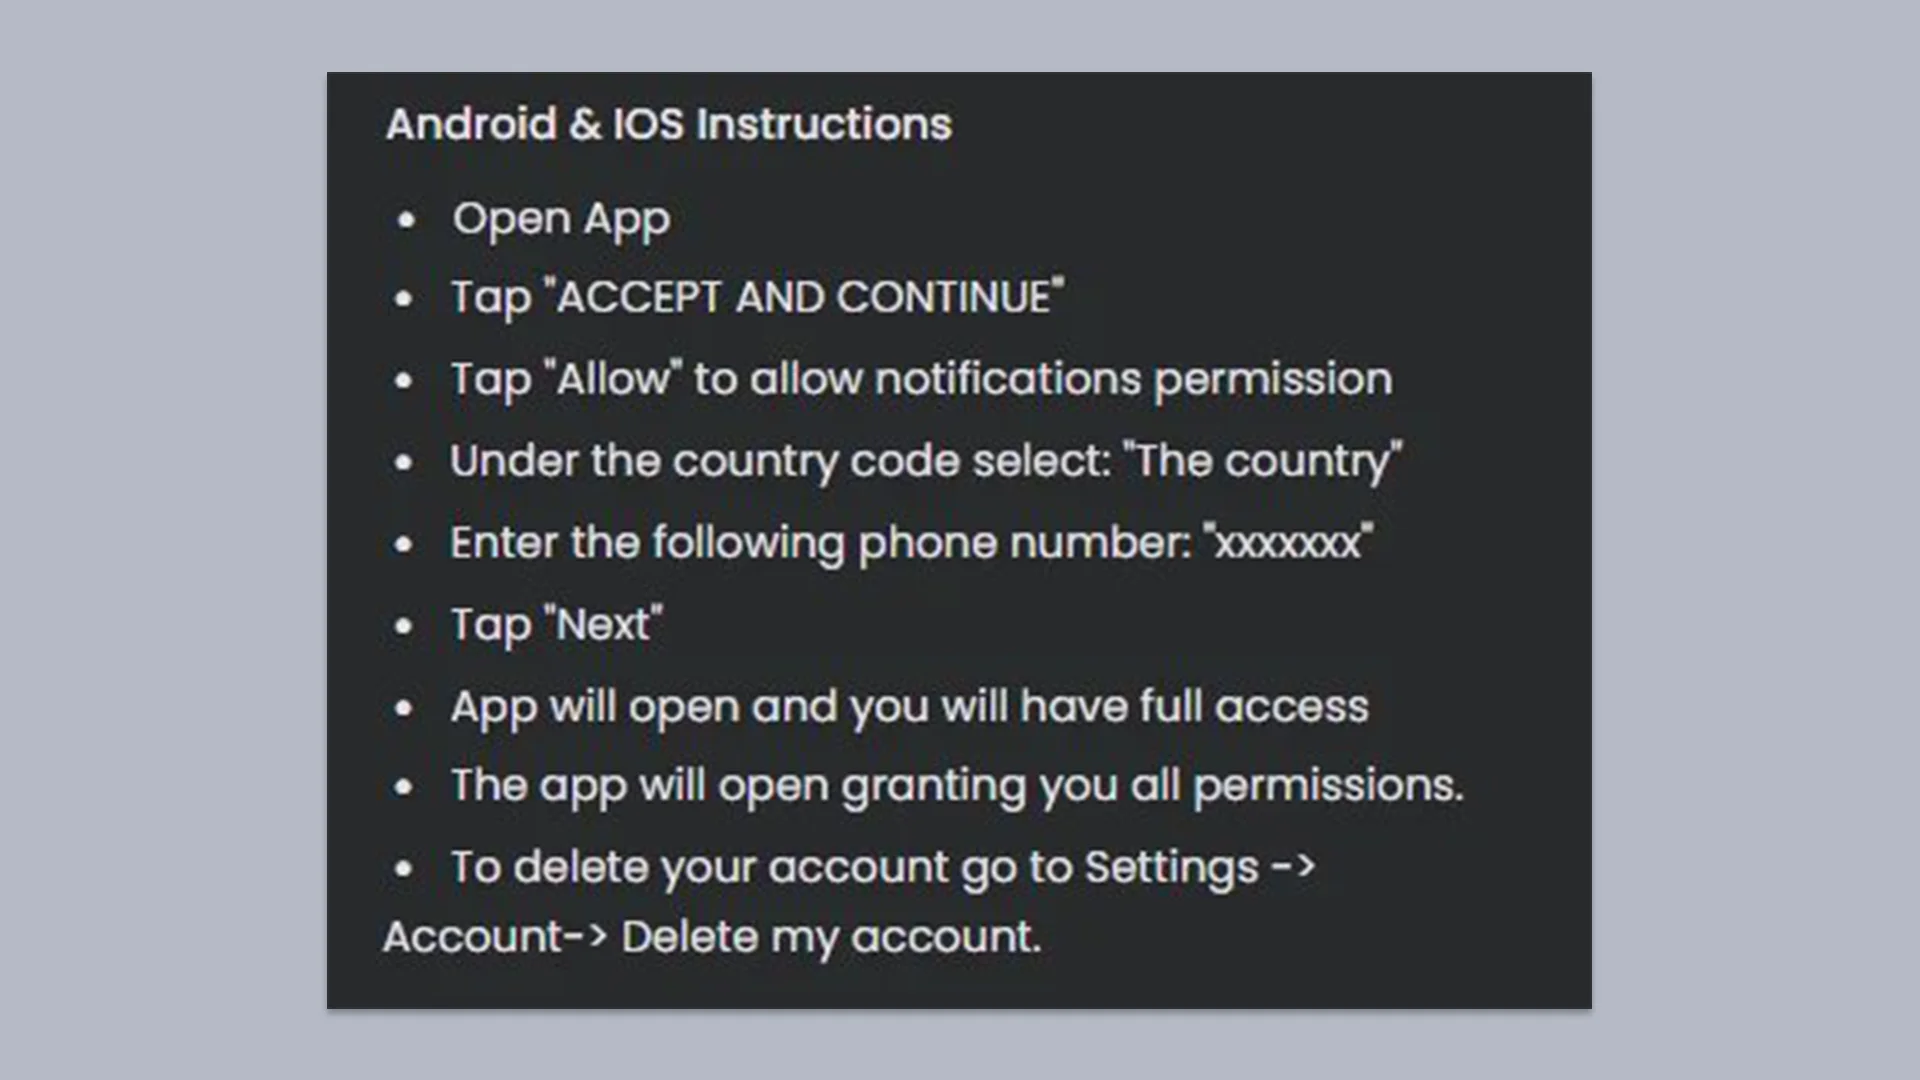
Copy your instructions and insert them in your Google Console account.
Google Play Console Account
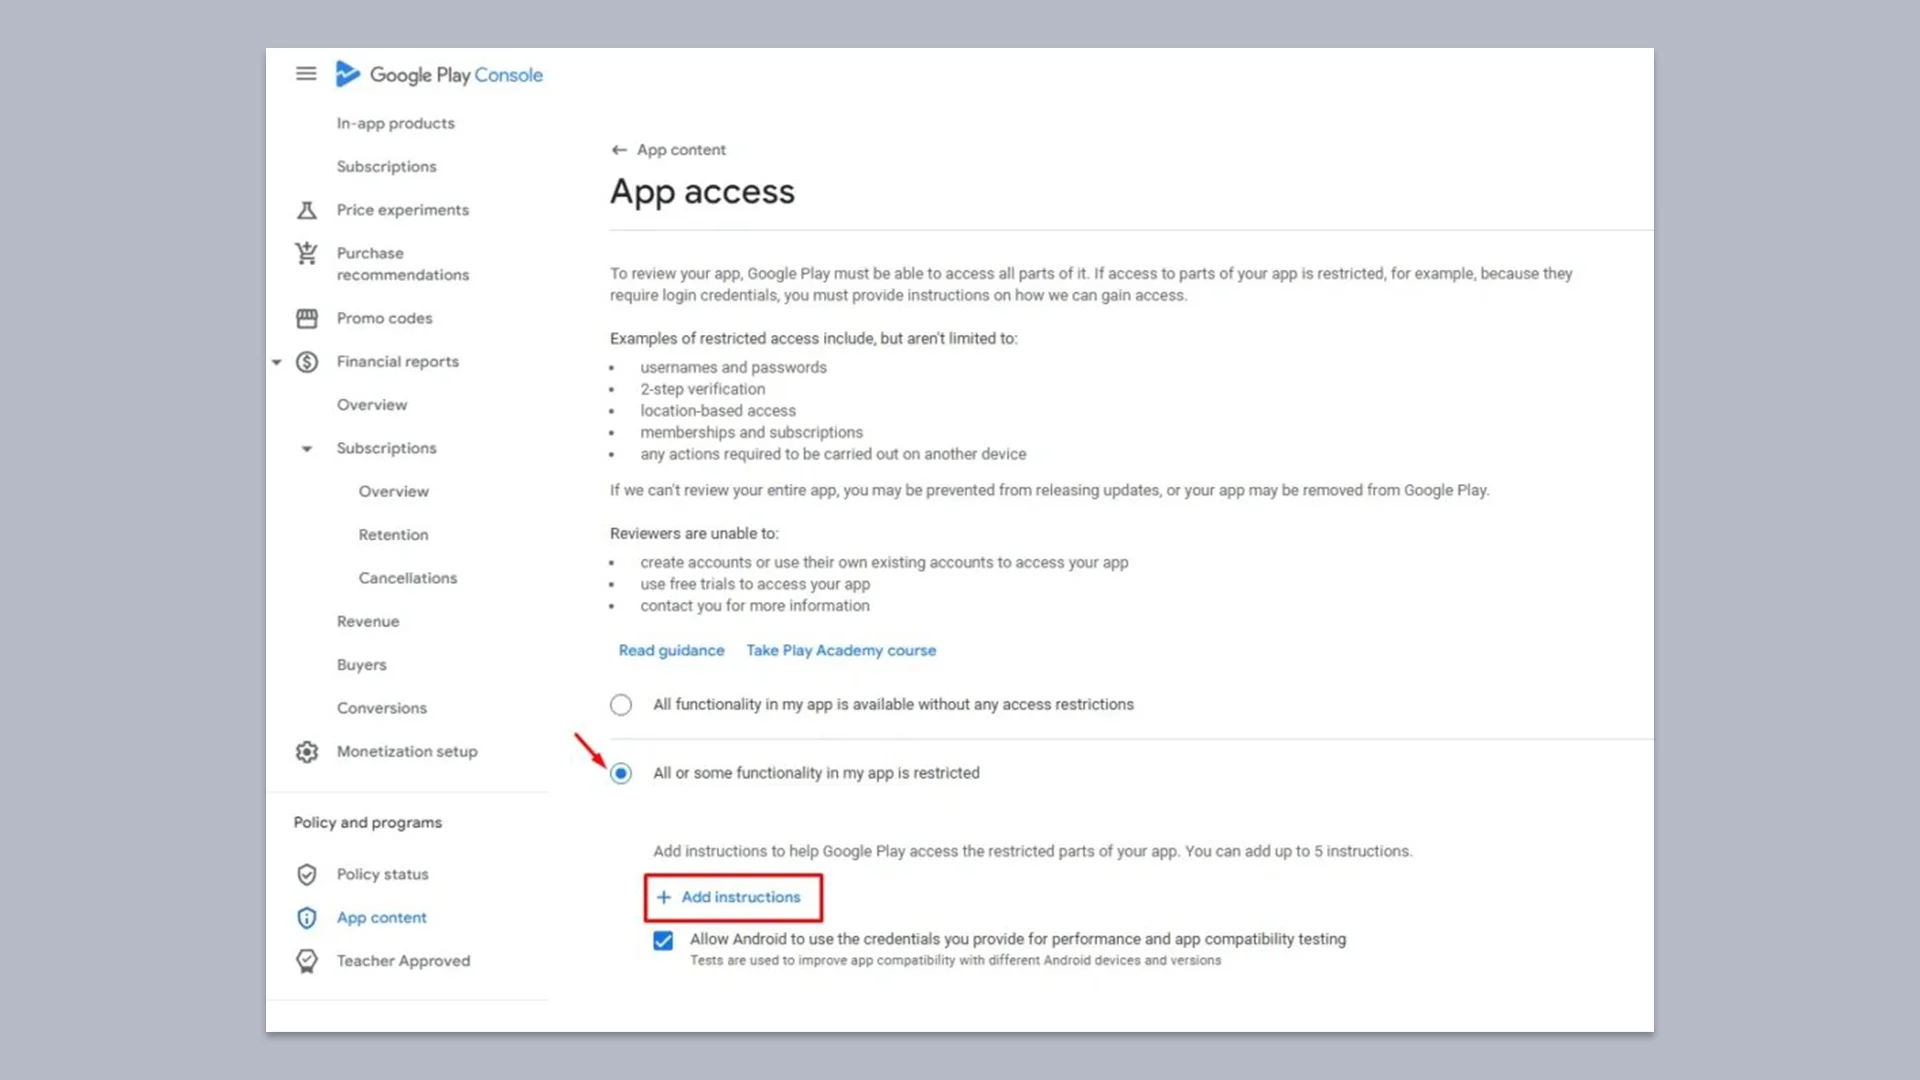
At the App Content section, click App Access, mark “All or some functionality in my app is restricted,” then click Add instructions
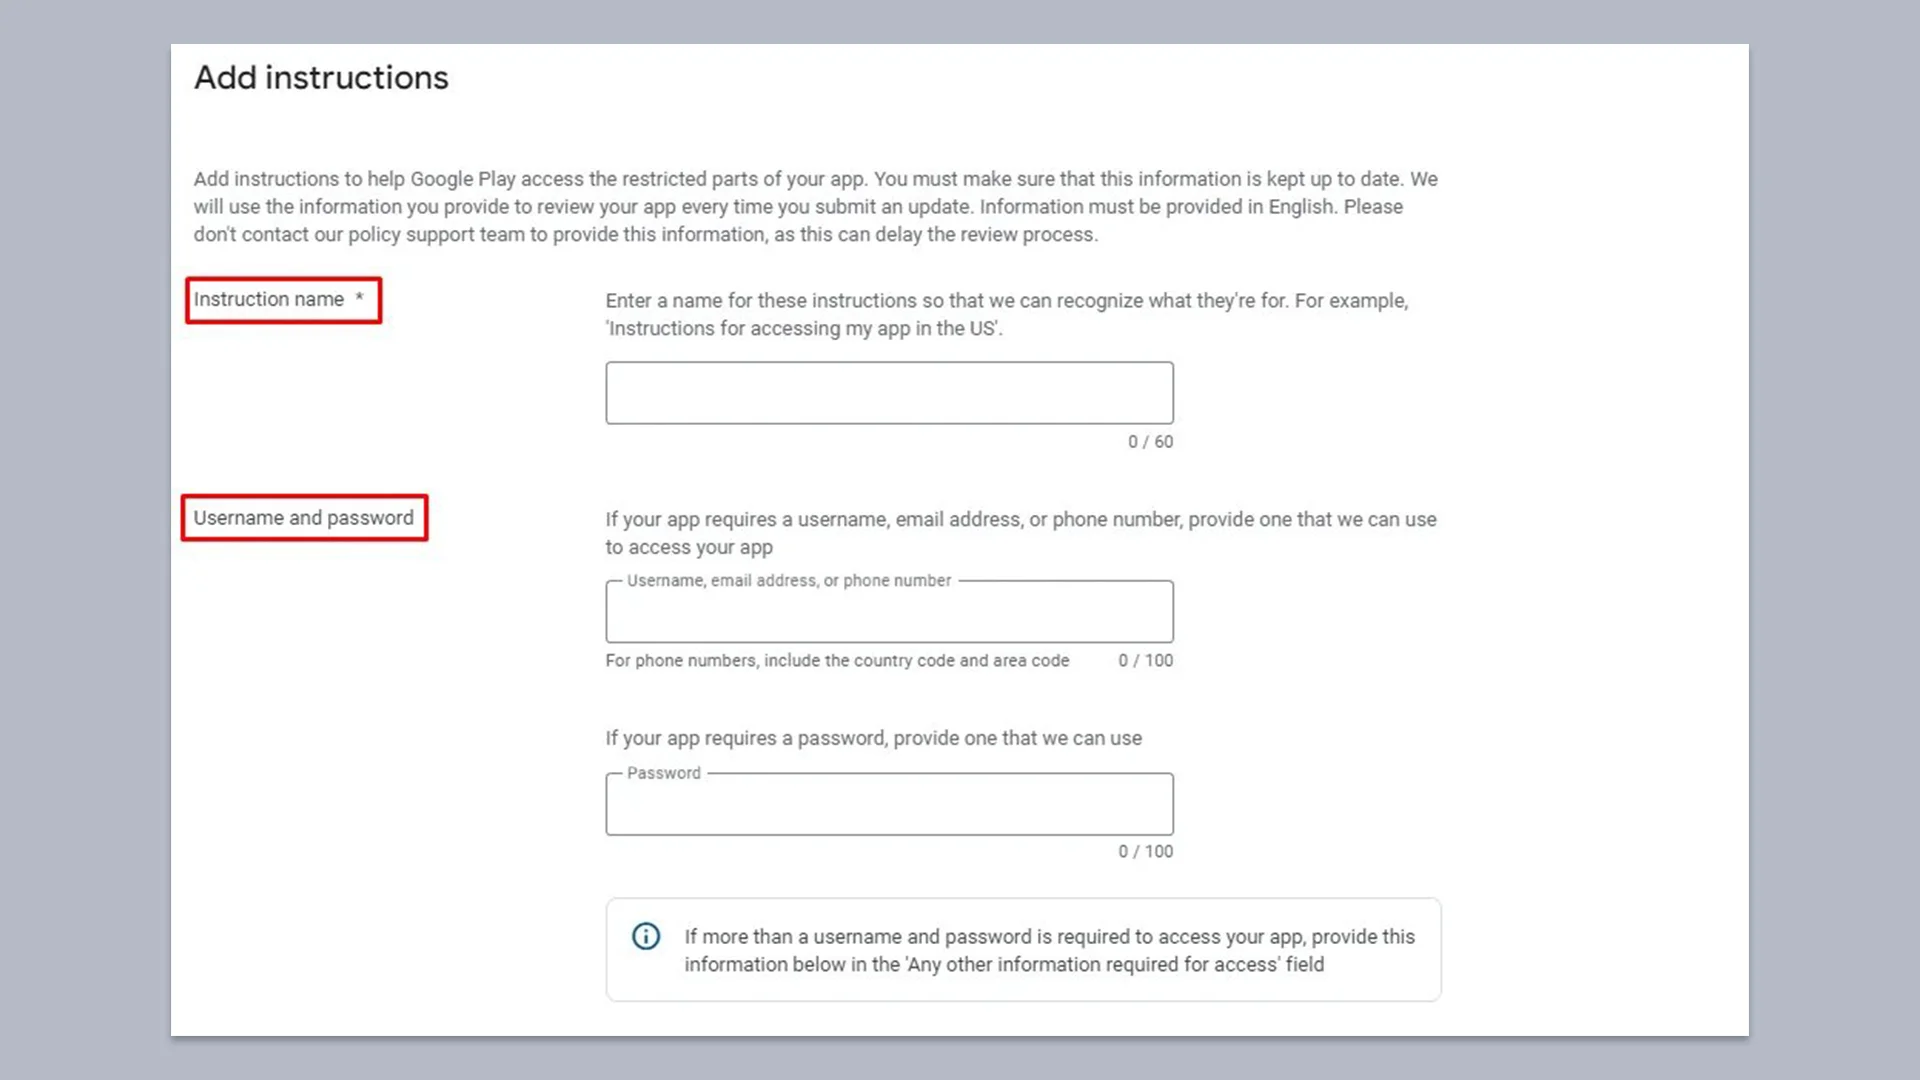
1. Add instruction name.
2. Add the email or the phone number used in your demo account.
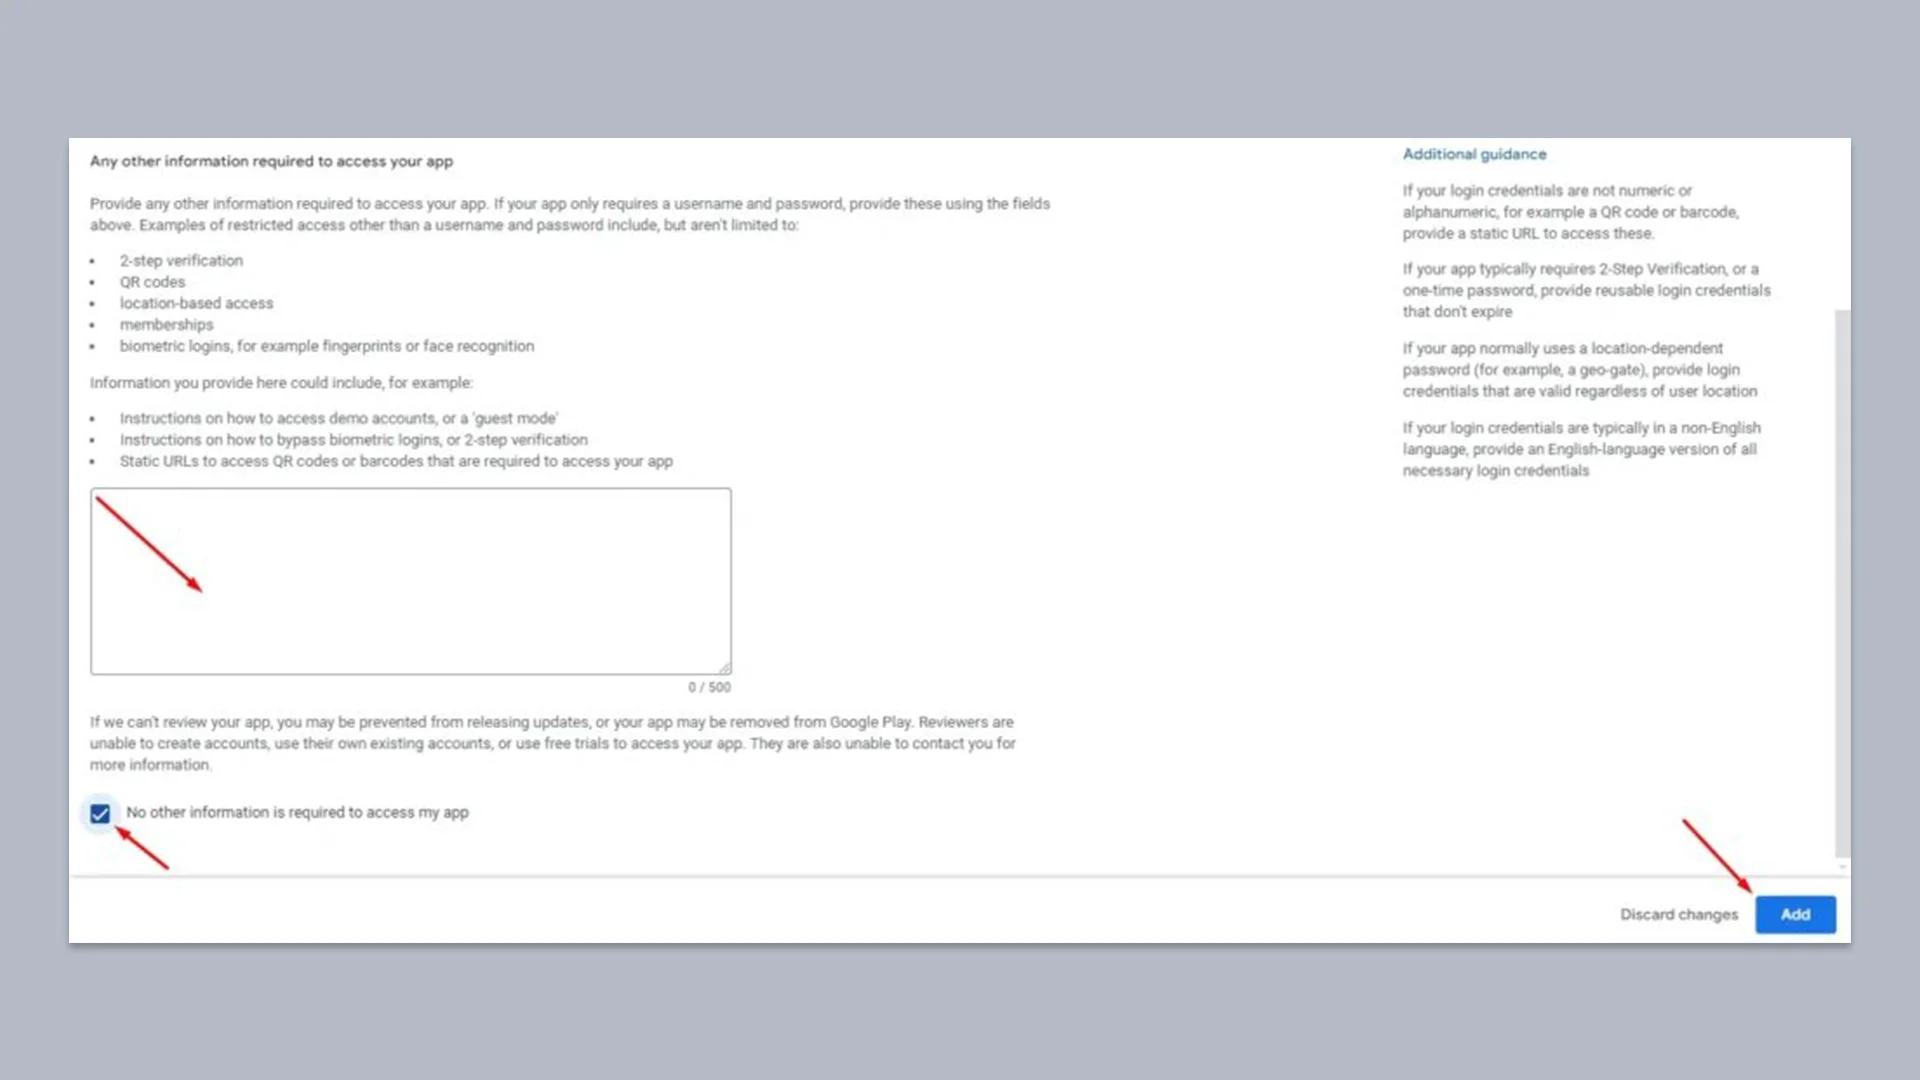
3. Then add the instructions in the empty box.
4. Don’t forget to mark ‘No other information is required to access my app.’
5. Then click ‘Add.’
Apple Developer Account
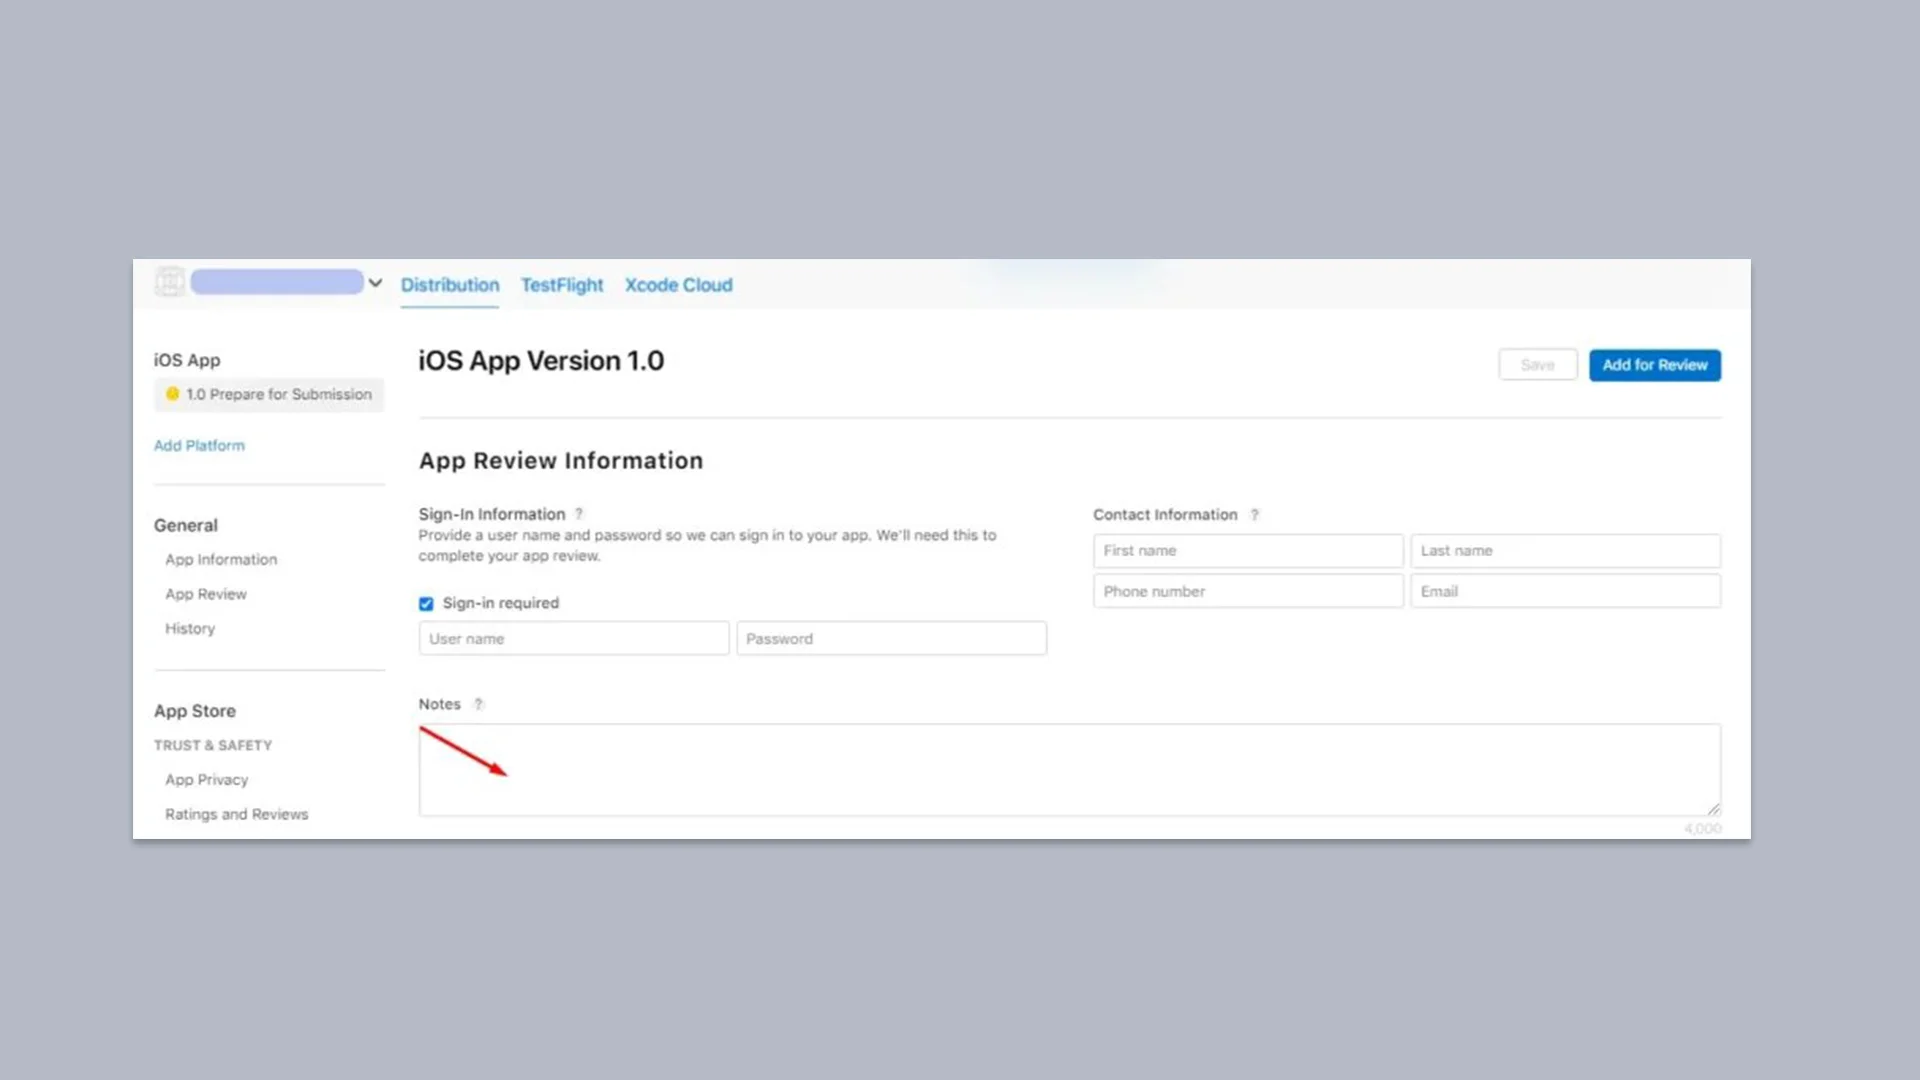
From the side menu of the Apple Developer Account, click “Prepare for submission, scroll down till you reach App Review Information, and add the instruction in the empty box.
It can be a hassle to learn how to publish an app on the Google Play Store or the App Store. You have many steps to take, all while worrying if your application is approved for publication or not. The app demo account setup that you create with nandbox facilitates part of the process. You can use it to upload and enlist your app for review with ease. Additionally, it doesn’t cost extra to upload both the Android and iOS versions of the first app you create. Sign up now to try out this feature and more on nandbox.

