Introduction
PayPal is the most used online wallet in the world, it can be used as a payment gateway in your store or channel where users can submit payments easily, this article will show you how to integrate PayPal in your app.
This module is the best to use if you want to build a E-Commerce App.
Installation
The module is found in the App Settings page.

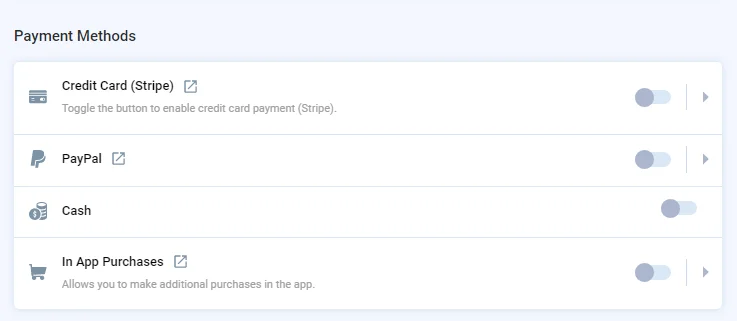
Once you click on App Settings, scroll down until you reach the payment methods section.
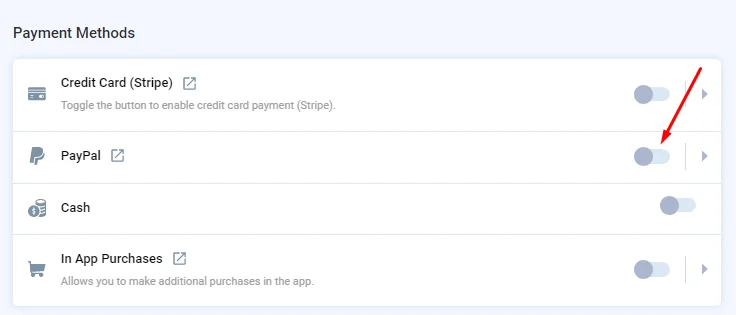
Click on the PayPal toggle to enable it.
Once you install this module in your app, it will be automatically integrated as the main payment gateway if you did not install any other payment gateway, however, if you did, it will give the user an option to choose which payment gateway to proceed with as follows:

Main Features
The PayPal module is a payment gateway, once you integrate PayPal with your app, users can use it to pay for items in your store, subscriptions on your channel or any in-app purchases, using a secure internet connection.
Users have to have a PayPal account in order to be able to complete the online transaction using the PayPal module.
Configuration
1.) Once you enable the module, click on the arrow to open the settings.

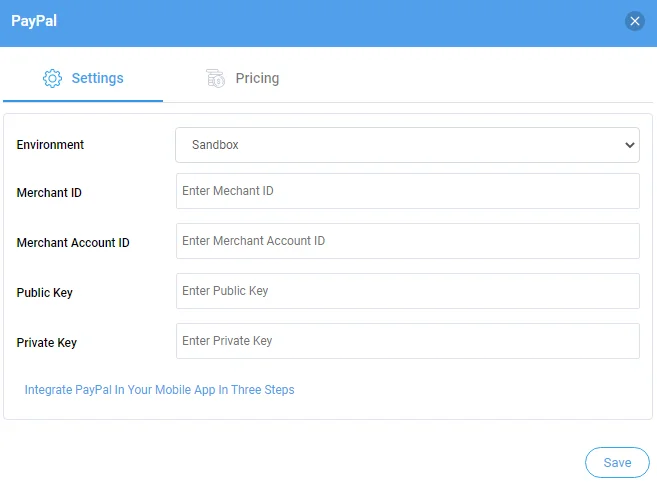
The first tab, includes some information that you need to fill-in to setup the module, we will show you how in the following steps:
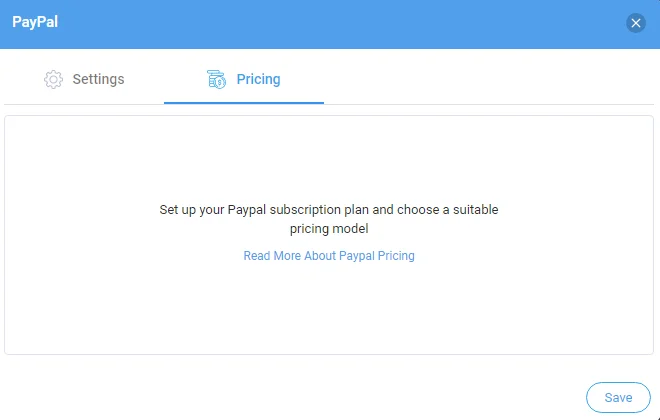
The second tab contains a link that will take you to PayPal’s pricing options.
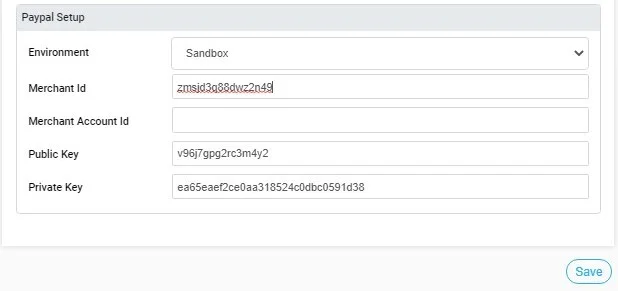
Now going back to the first tab, the first option is the “Environment” where you can choose “Sandbox” or “Production”
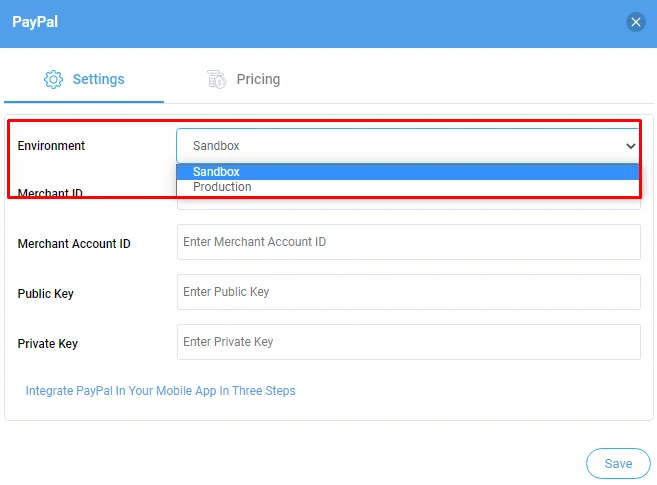
Choose “Sandbox” if you are testing your payments and want to make sure everything is running smoothly.
Choose “Production” if you are ready to go live.
For the “Sandbox” option, you will need to create a PayPal Business Account.
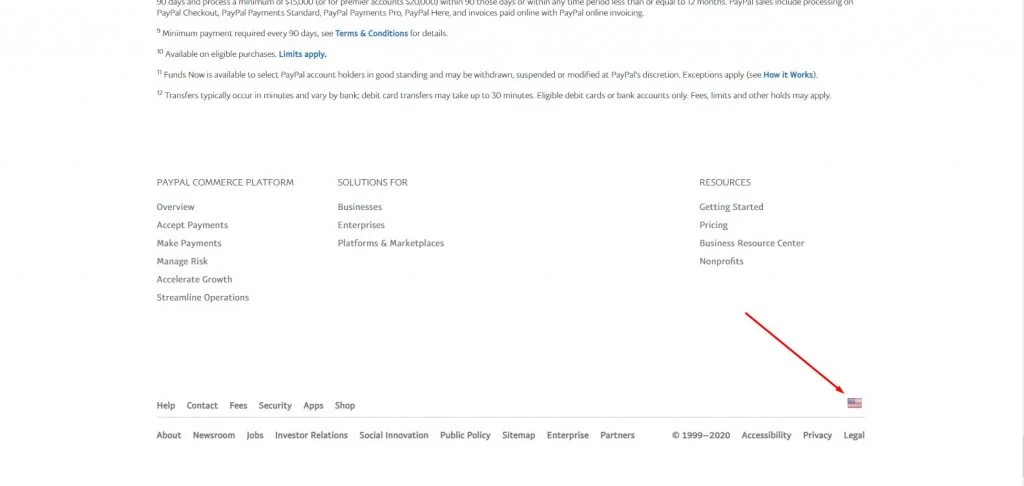
– Note that before you sign up to a new PayPal business account, make sure that the country you select is the country where your business is located, by clicking on the country’s flag and selecting your country.
1.) Go to the following link and select Business Account then follow the steps.
Create an Account on BrainTree
2.) Go to BrainTree.
BrainTree is considered to be PayPal’s SDK.
SDK stands for software development kit, and it is a set of software tools that is required to have certain features function properly, so you would need an Android SDK toolkit to build an Android app, an iOS SDK to build an iOS app, and a BrainTree SDK to be able to integrate PayPal with your app.
Note: When you create your BrainTree account, make sure that the currency you select is the same currency you selected in your PayPal account.
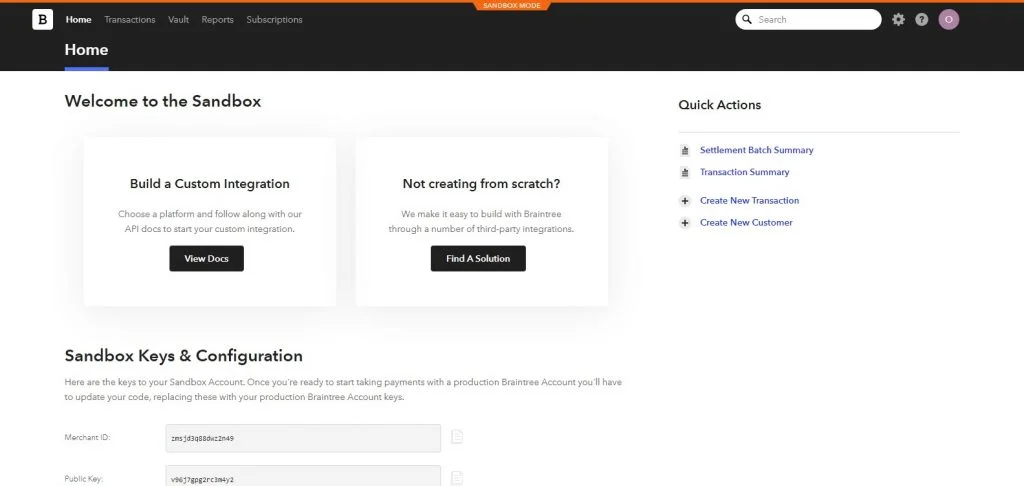
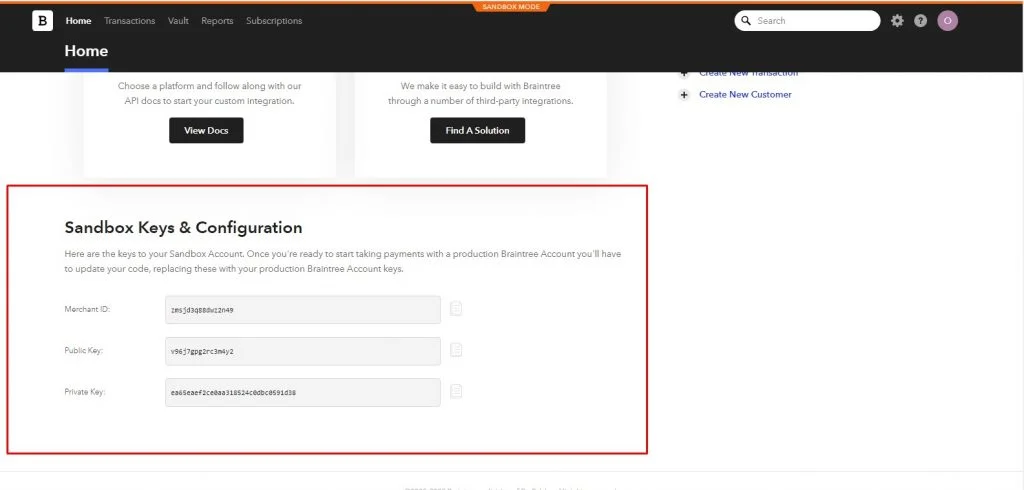
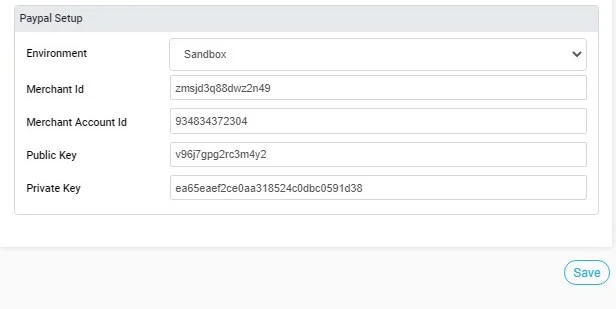
3.) After you completed the sign up process by opening the support email that BrainTree sent you, you will be prompted with this screen, scroll down and you will find the “Merchant ID”, the “Public Key”, and the “Private Key”.
4.) Copy the keys and paste them in their perspective spaces in the app builder.
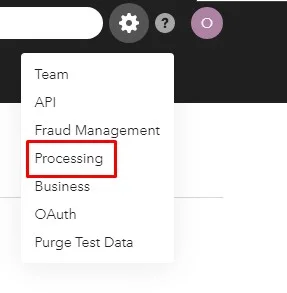
5.) Next, click on the gear icon on the home page.
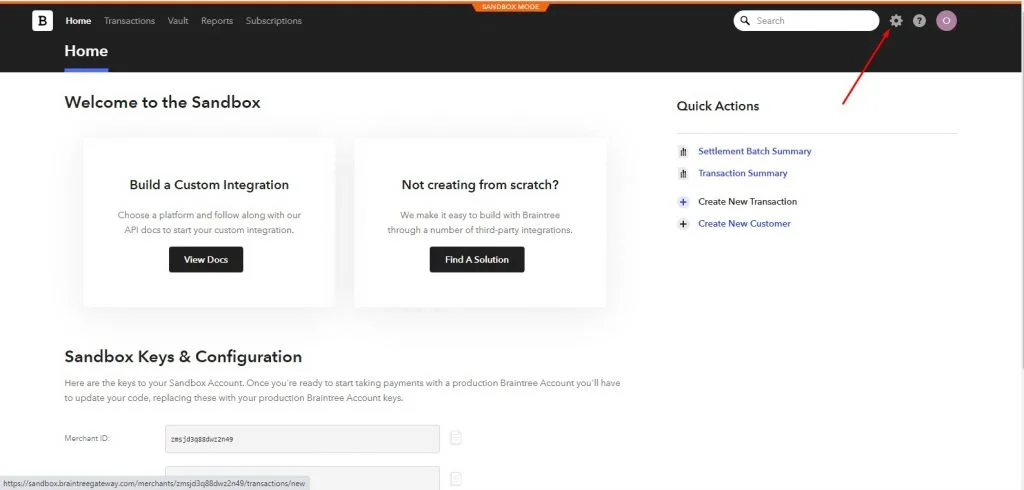
And select “Processing”
6.) Click on “Link Sandbox”.
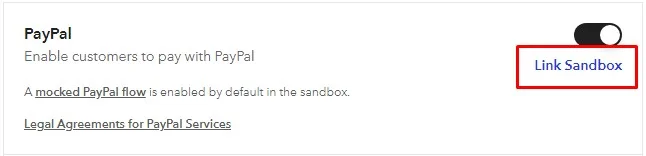
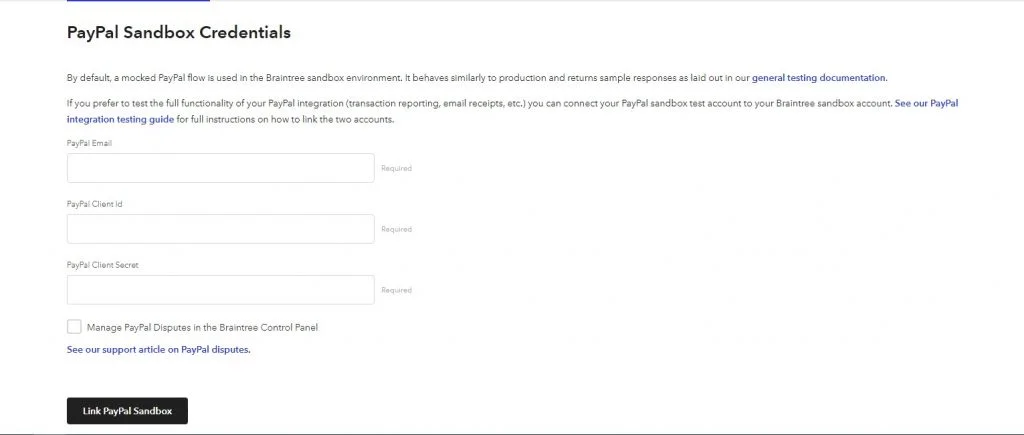
You will be prompted with the following screen.
How to get your Paypal Credentials [Client ID, Client Secret]?
First, you need to create your sandbox account
Note: These steps are also for making test payments later.
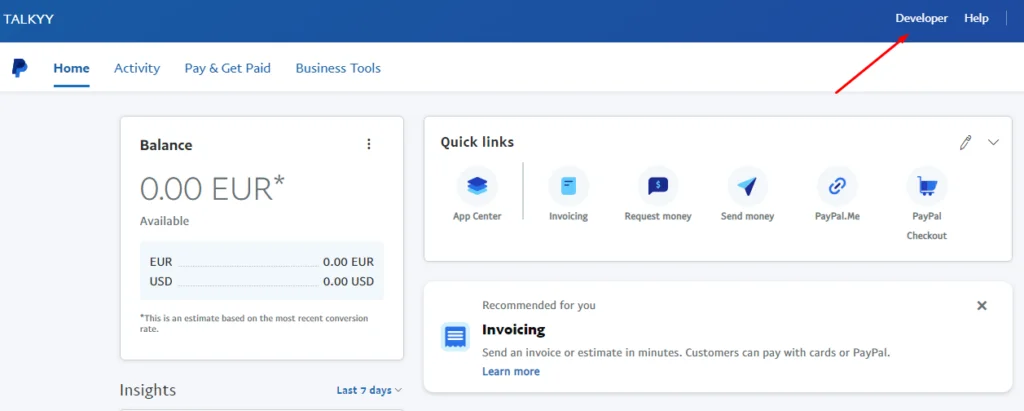
1.) From your Paypal home menu [right at the top], select “Developer”.
2.) Select “Developer Dashboard”.
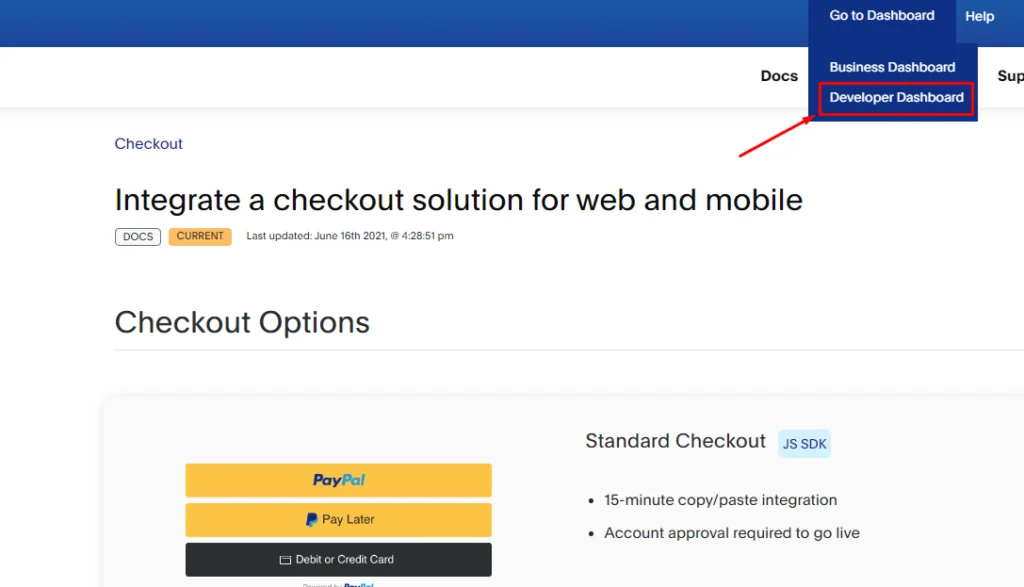
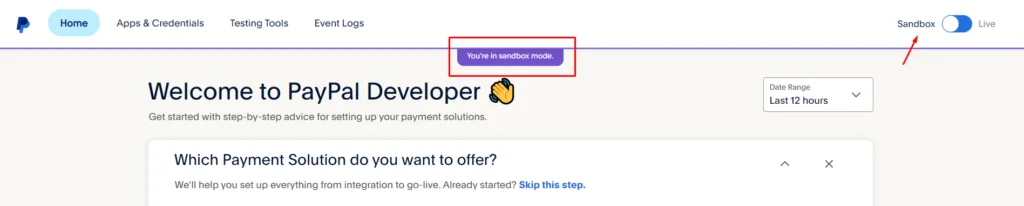
3.) Make sure that your dashboard is on sandbox mode.
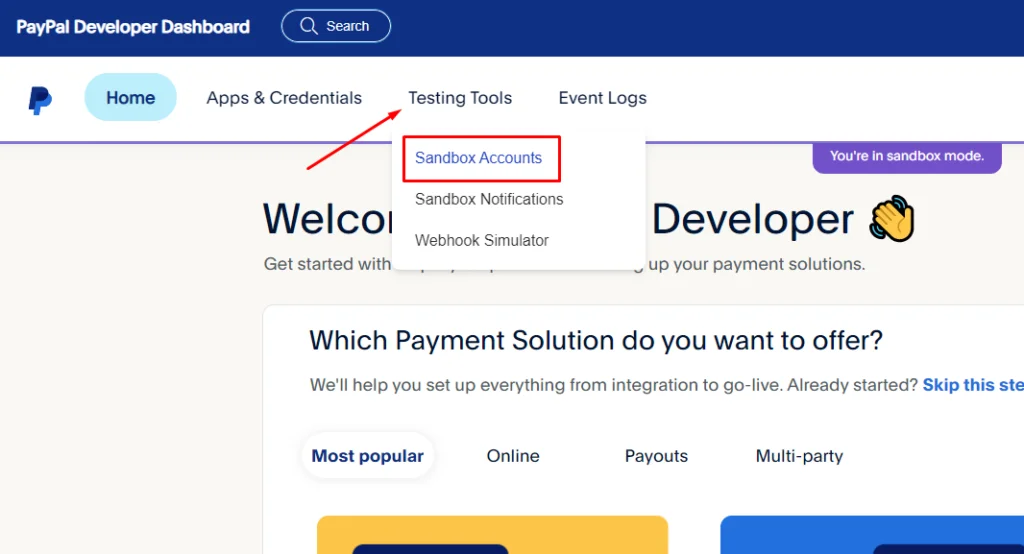
4.) Then move on “Testing Tools” button and select “Sandbox Accounts”
5.) Click “Create Account”
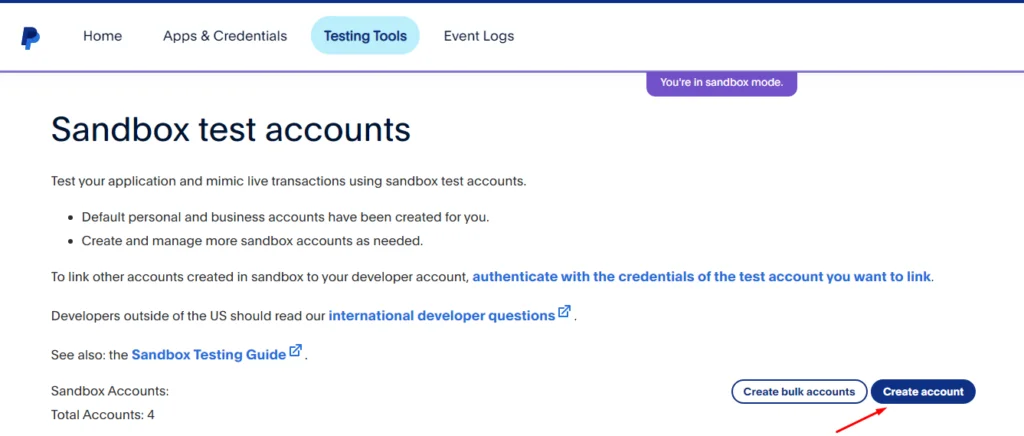
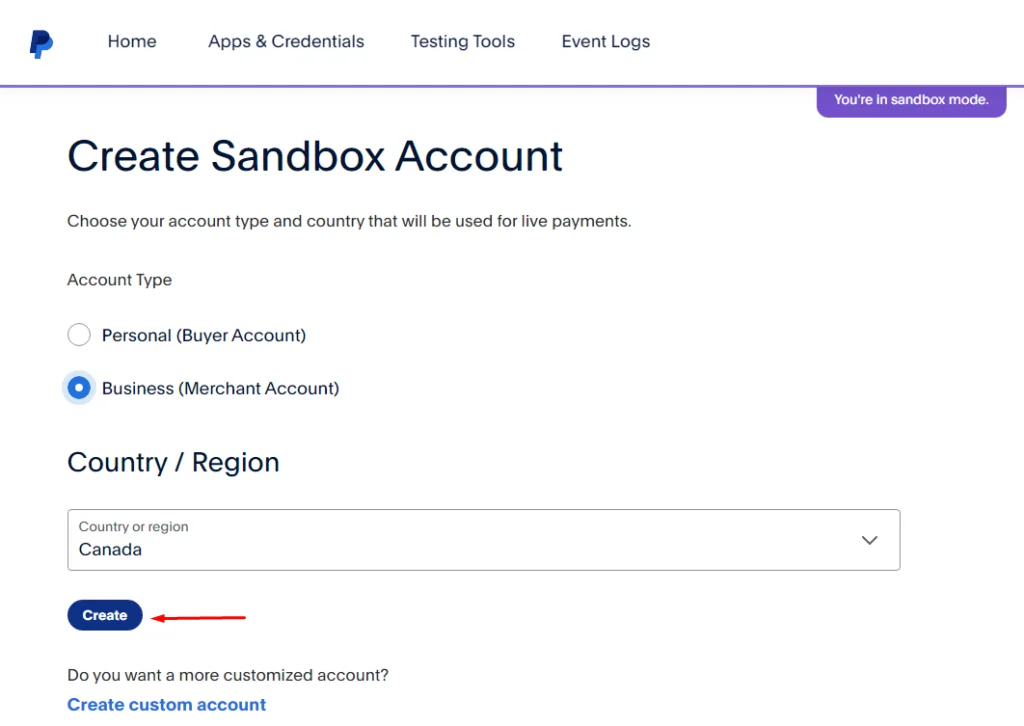
6.) Choose “Business [Merchant Account]”

7.) Select your region
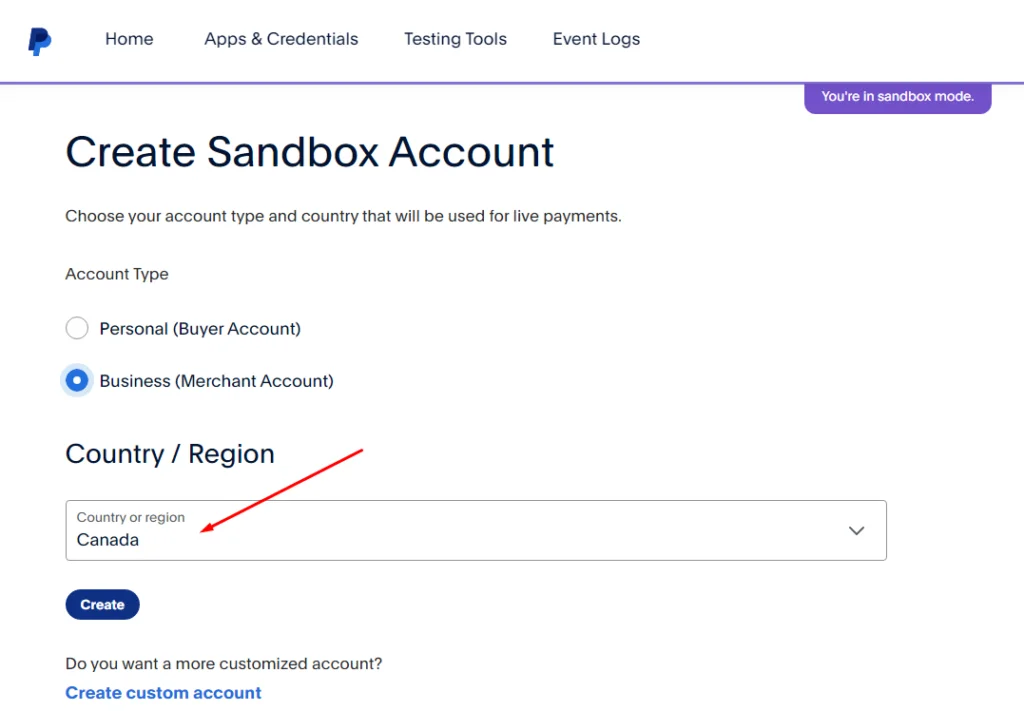
8.) Then click ‘‘Create’’.
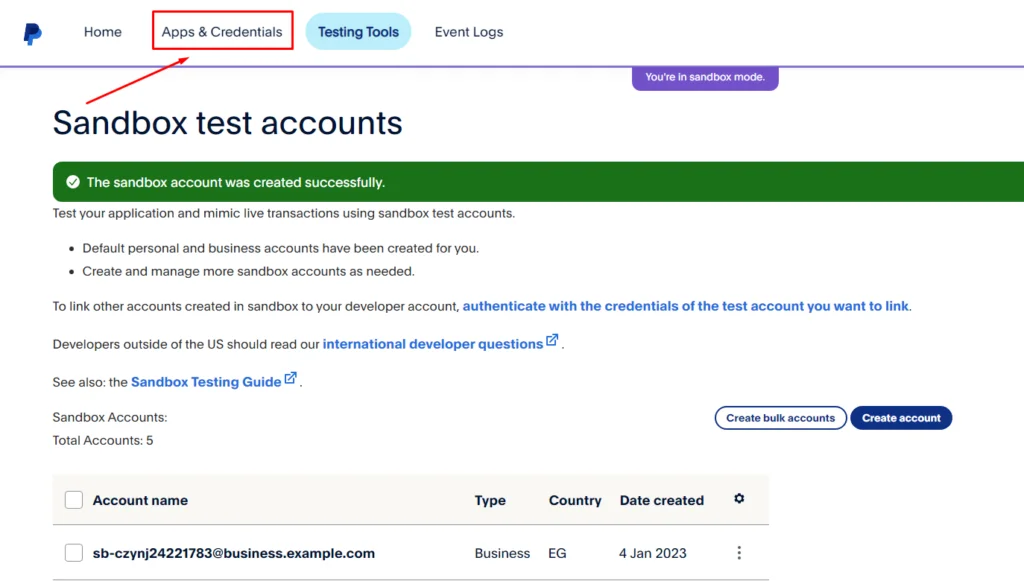
After making your sandbox account:
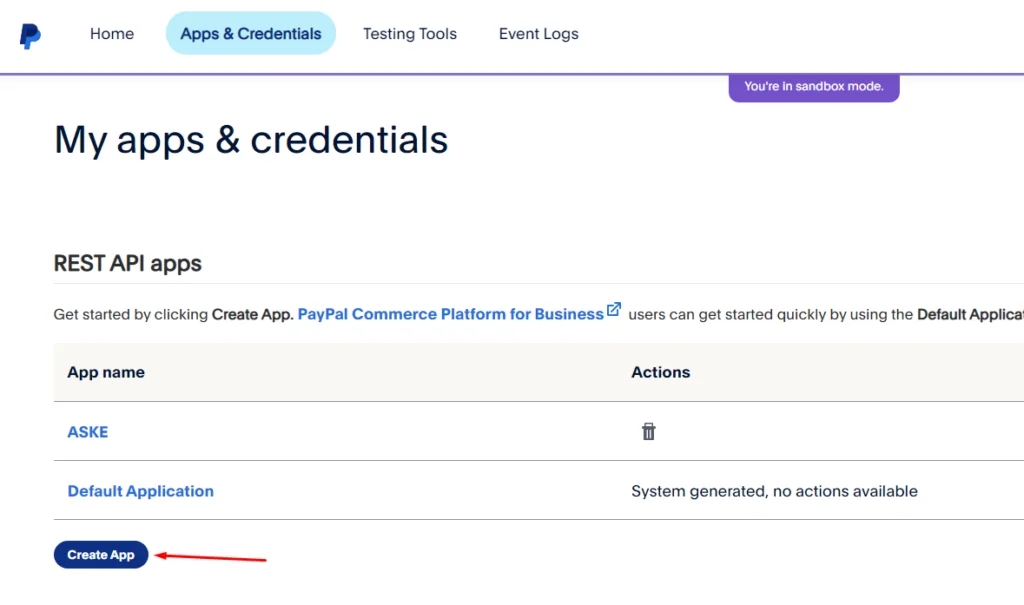
1.) Select “Apps & Credentials” next to “Testing Tools”
2.) Scroll down then select “Create App”.
3.) Then fill in the required App details:
- App name
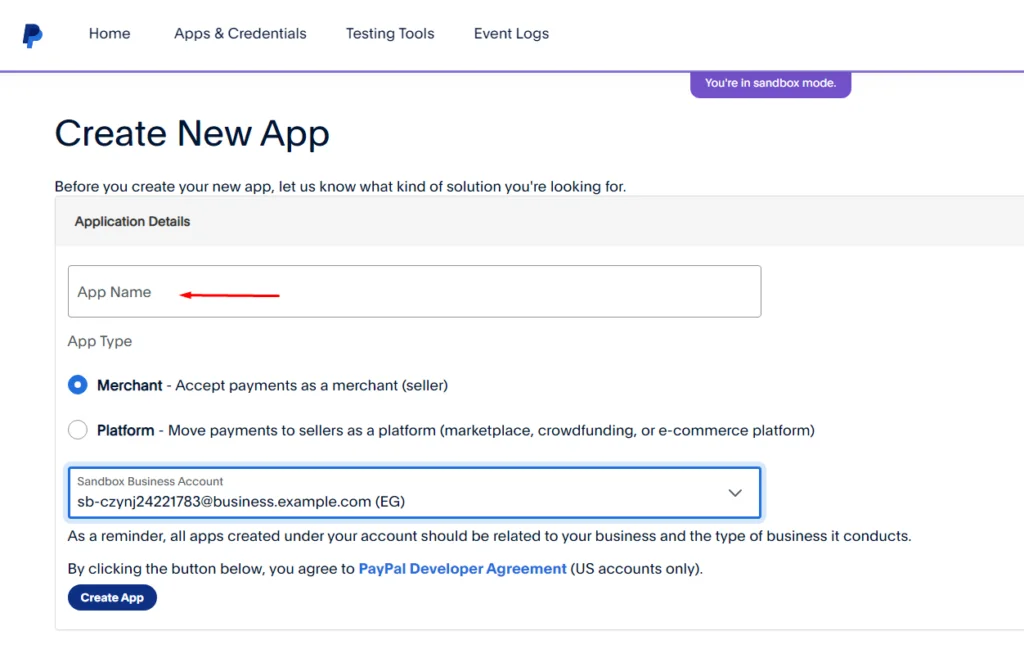
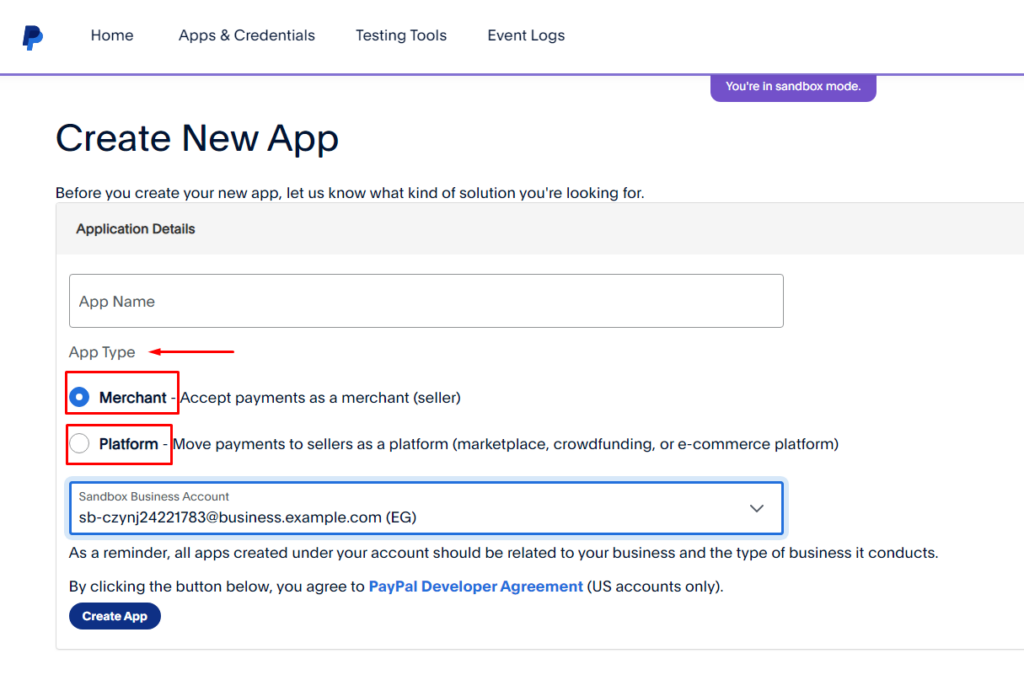
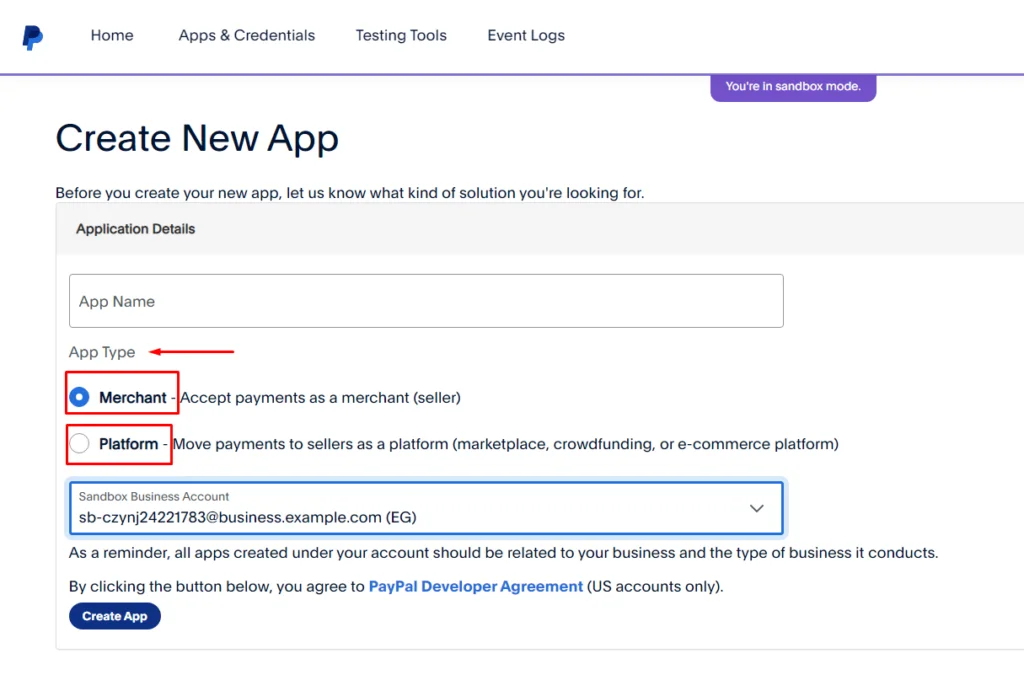
- App type [Merchant – Platform]
- The sandbox account you created
– Choose “Merchant” if your app is self-owned app.
– Choose “Platform” if your app is integrated with other enterprises (Useful for E-commerce apps, Store module).
4.) Then click “Create app”
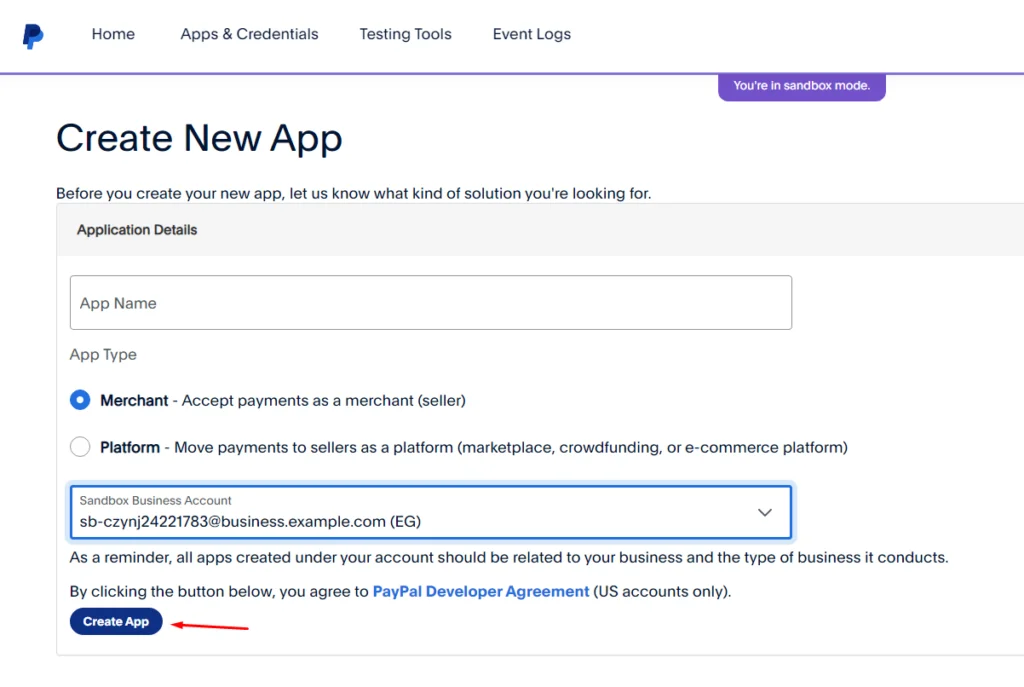
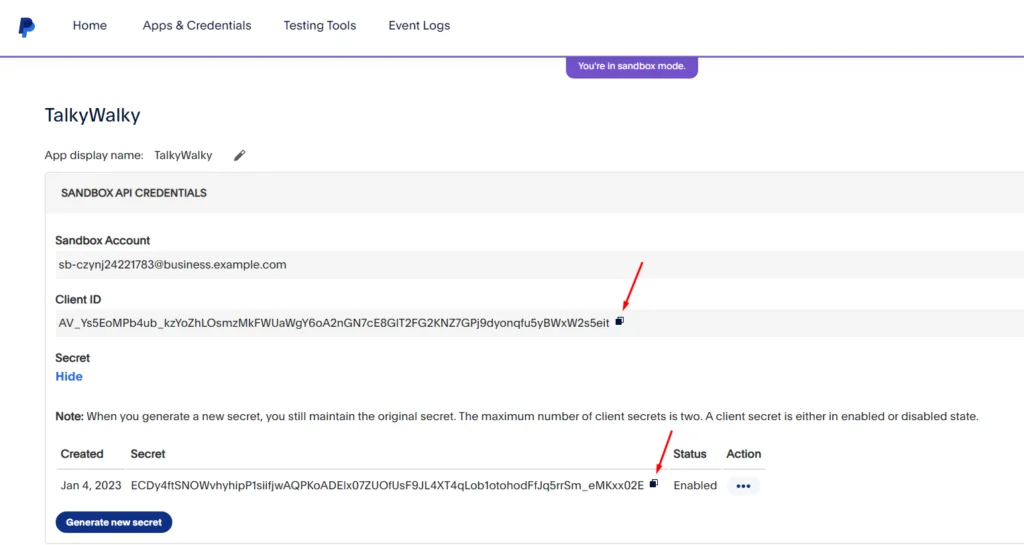
5.) A screen will pop up with your Client ID and Client Secret.
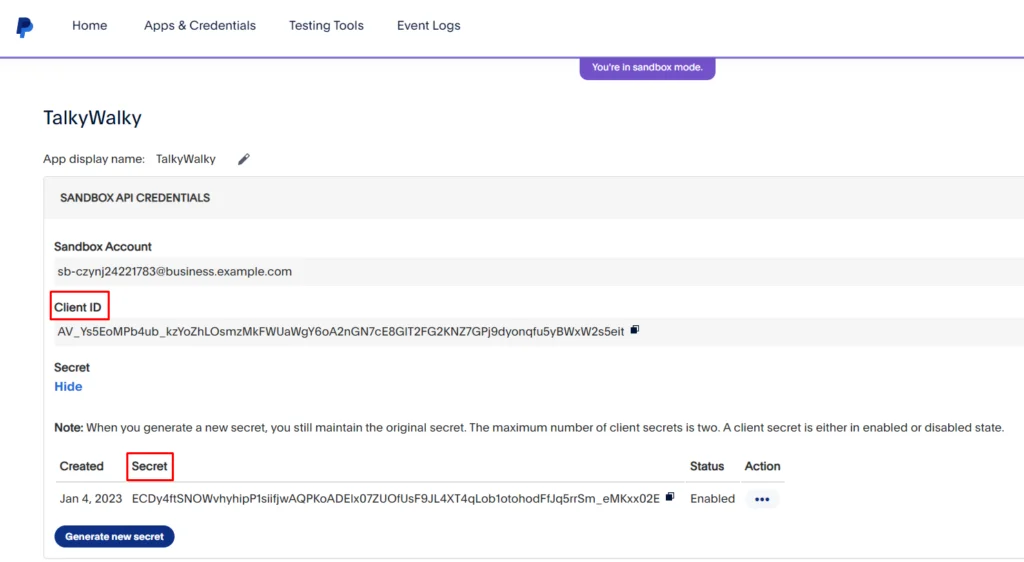
6.) Copy both of them.
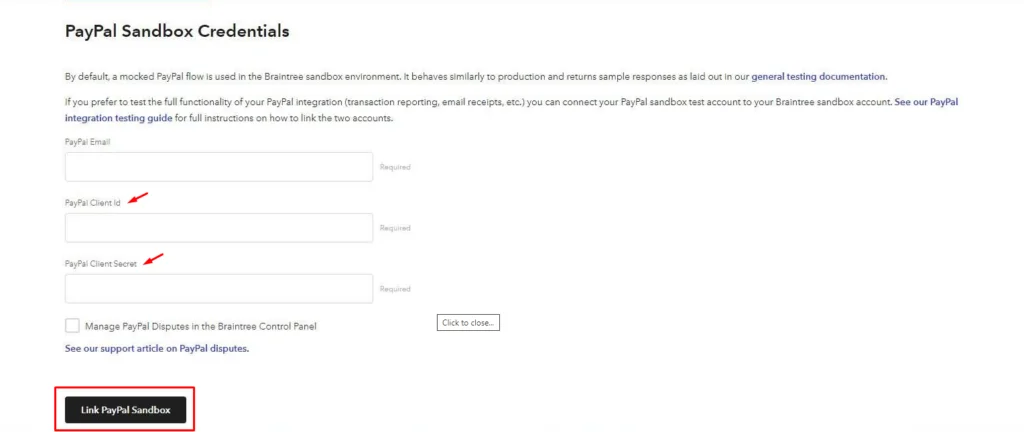
7.) Go back to your braintree control panel and insert your Paypal credentials
8.) Click “Link Paypal sandbox” button, then you’re ready to go.
9.) Lastly, click on the gear icon again and select “Business”.
Create a New Sandbox Merchant Account
10.) Click on “New Sandbox Merchant Account”
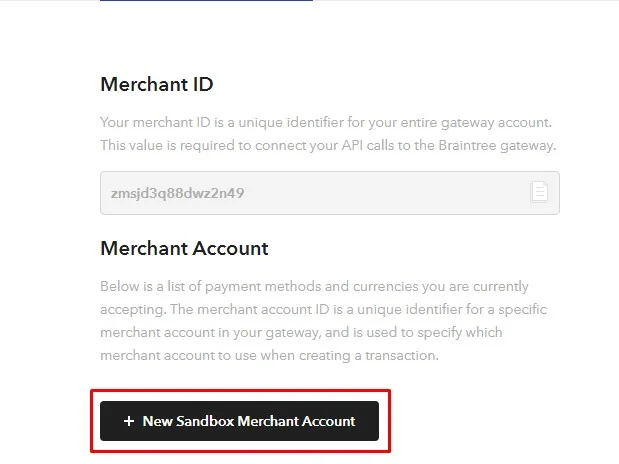
11.) Create a new merchant account ID and set it as the default ID, make sure that the currency you select is the same as the PayPal account’s currency.
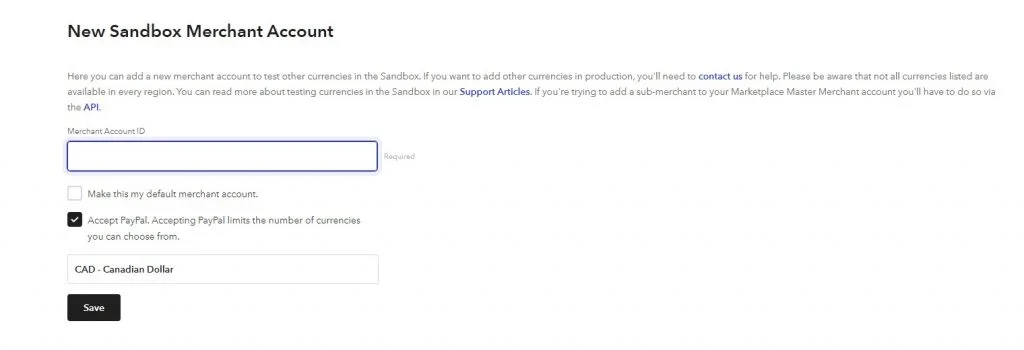
12.) Next, copy the Merchant Account ID and paste it in the app builder, and click save.
Complementary Modules
-
Store/Shop: It allows you to create a full e-store where you can display your products or services.
-
Channel Modules: Channels allow you to post messages, images, videos, and files, with the option of targeting and segmentation, you can also charge your users for a monthly subscription to your channels.
-
User Booking: A module that allows users to book events from your app.